



 Fabian Lainé
Full Guide
Stardew Valley: the museum is 42 artifacts and 53 minerals — and the real reward comes at the 60th donation, not the 95th
In brief
The Stardew Valley museum has exactly 42 artifacts and 53 minerals for a total of 95 items. The real strategic reward comes at the 60th donation with the Rusty Key that unlocks the Sewers, well before full completion, while the Crystalarium at 50 minerals durably transforms the game's economy.
Pelican Town's museum is often reduced to a late-game checkbox. That's a scheduling mistake: the most useful reward in the whole run comes at the 60th donation, well before the end, and it unlocks an entire area of the game.
The exact count first, since a wrong figure keeps circulating. The collection totals 95 items: 42 artifacts and 53 minerals. The French-language wiki lists "52 artifacts," which would make 105 items and contradicts its own total of 95 — that's an error, corrected on the English version. Remember 42 + 53.
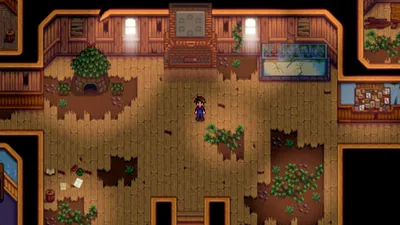
Gunther, the curator, receives you from 8:00 a.m. to 6:00 p.m., with doors closed on festival days. Only one copy of each item is accepted, and donations can be rearranged as long as the collection isn't complete.
The 60-item milestone gives the Rusty Key, and the Rusty Key unlocks the Sewers
This is the only donation that unlocks an area. After the 60th item, Gunther doesn't hand you anything on the spot: he comes to congratulate you at the farm's entrance the next morning, and gives you the Rusty Key, which is used to enter the Sewers.
Two details that will cost you days if you overlook them: the handoff happens the day after the donation, not the same day; and in multiplayer, it's the host who has to talk to Gunther to get it.
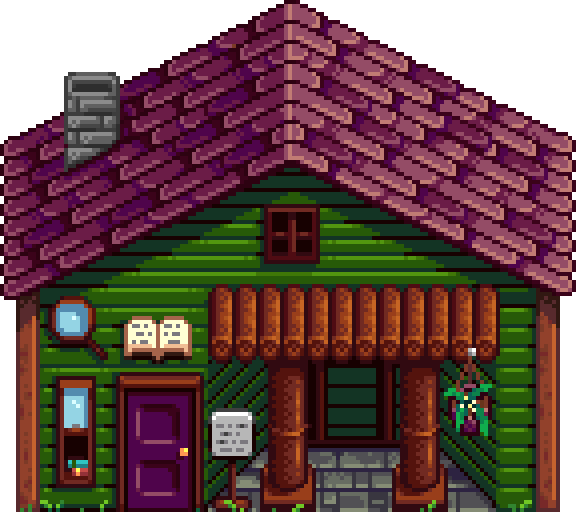
The thirteen cumulative donation milestones, in order
| Items donated | Reward |
|---|---|
| 5 | Cauliflower Seeds (9) |
| 10 | Melon Seeds (9) |
| 15 | Starfruit Seeds (1) |
| 20 | "A Night on the Hill" painting |
| 25 | "Emerald Hills" painting |
| 30 | Large Futan Bear |
| 40 | Collector's Scarecrow #8 (+ "Treasure" achievement) |
| 50 | Bear Statue |
| 60 | Rusty Key (delivered the following day) |
| 70 | Triple Shot Espresso (3) |
| 80 | Warp Totem: Farm (5) |
| 90 | Magic Rock Candy |
| 95 | Stardrop (+ "A Complete Collection" achievement) |
The 15-item milestone deserves a note: Starfruit Seeds are normally bought at the Desert Oasis, from Sandy. Receiving one as early as the 15th donation lets you start one of the most profitable summer crops in the game well before you'd otherwise have access to that shop.
Minerals have their own scale, and the Crystalarium is the top of it
Alongside the overall count, minerals trigger five rewards on their own:
| Minerals donated | Reward |
|---|---|
| 11 | Geode on a pedestal |
| 21 | Musical Stone |
| 31 | Obsidian Vase |
| 41 | Crystal Chair |
| 50 | Crystalarium |
The Crystalarium duplicates any gem placed inside it: along with the Rusty Key, it's the only museum reward that lastingly changes a playthrough's economy. It takes 50 minerals out of 53, so essentially the entire mineral collection.
Artifacts work in sets, not just by quantity
The artifact side is the most misunderstood, because some rewards don't depend on the number but on the combination of items donated.
- "Fire Offering" requires 11 artifacts, including the Rare Disc and the Dwarf Gadget. If you reach 11 without those two, the reward doesn't arrive: it's the 11th donation meeting the conditions that triggers it.
- 15 artifacts give the Skeleton Statue; 20 artifacts, the Collector's Scarecrow #7.
- Ancient Drum + Ancient Seed + a third artifact give the Drum Block, Ancient Seeds and their crafting recipe.
- Bone Flute among three artifacts gives the Flute Block; Chicken Statue among five gives the Chicken Sculpture.
- The four Dwarvish Scrolls I to IV give the Dwarvish Translation Guide — essential for understanding Dwarvish and accessing the Dwarf's shop.
- Prehistoric bones combine into three Sloth Skeletons (S, M and L) depending on the pieces donated.
Where to find what's missing, when the collection plateaus
Past the first few summers, the collection almost always gets stuck on the same categories.
- Minerals come from geodes, which need to be cracked open at the blacksmith's. Rare gems are concentrated in the Skull Cavern and the Volcano Dungeon on Ginger Island.
- Artifacts come from artifact spots — those little worms wriggling on the ground —, mine chests and chests fished up while fishing. Loot tables depend on location: a missing artifact almost always corresponds to an area you don't visit.
- The Prismatic Shard is not part of the collection: don't donate it out of habit, it has better uses.
The layout detail nobody warns you about until it's too late
The museum offers 102 slots for 95 items. Six of them, at the center of the largest table, cannot be reached: an item placed there can never be examined again.
Leave that area empty from the start. Once the 95th item has been donated, donations can no longer be moved at all — and moving an item requires having a new item to donate, since the donation screen won't open otherwise.
What the complete collection really contributes to Perfection
It's often said that completing the museum "counts toward Perfection." That's true, but indirectly, and the nuance matters.
The Perfection score breaks down into eleven criteria — walnuts, obelisks, the Golden Clock, monster eradication, friendships, skill levels, recipes, crafting, fish, Golden Walnuts and Stardrops. The museum doesn't appear as such. However, the complete collection gives one of the seven Stardrops, and that criterion is worth 10% of the total.
In other words: you can come close to 100% Perfection without ever giving a single item to Gunther, but it's impossible to reach it. And since the game hasn't changed since 1.6.15, and the next update has been announced without a timeline, these 95 items will remain the same for quite a while.
Share this article
At which museum milestone are you really motivated to keep going?
Frequently asked questions
Is it really worth waiting for 50 minerals for the Crystalarium?
Yes, absolutely. A Crystalarium produces an endless clone of any gem, which explodes your income. It's one of the two museum rewards that truly change the game, along with the Rusty Key.
I've been stuck on certain artifacts for weeks, is that normal?
Very normal. Most are missing because you're not visiting the areas where they drop: floor artifact spots, the Skull Cavern, the Volcano Dungeon on Ginger Island, or fishing treasure chests. Systematically search these spots.
When exactly does the Rusty Key handoff happen?
The day after the 60th donation. Gunther comes to congratulate you at your farm's entrance in the morning, that's where you receive it, not at the museum itself. In multiplayer, the host must talk to Gunther.
Do you really need to complete the museum for 100% Perfection?
Yes. The complete museum gives you one of the seven mandatory Stardrops for full Perfection. It's impossible to skip.
Key takeaways
- The 60th donation gets you the Rusty Key and unlocks an entire area, that's THE milestone to aim for before even thinking about full completion.
- Minerals require 50 items out of 53 to unlock the Crystalarium, which duplicates gems and revolutionizes your income.
- Some artifacts aren't donated by number but by specific combination: you need the right items at the right time, not just fifteen random things.
- Six slots at the center of the largest table become inaccessible once filled, so leave them empty from the start.
- Completing the museum gives you one of the seven Stardrops needed to reach 100% Perfection, impossible to skip.
Comments
No comments yet. Be the first to react!
Leave a comment
Similar guides



Latest articles






Your opinion counts
Rate Stardew Valley
Click a star to rate