



 Fabian Lainé


Full Guide
Stardew Valley: All 130 Golden Walnut Locations on Ginger Island
In brief
Ginger Island holds exactly 130 golden walnuts to collect, but their actual locations are never fully covered in guides. This article breaks down zone by zone where to find them (65 by fishing, 33 that drop on their own, 36 locked behind puzzles, and the rest through exploration), details the order in which to purchase the parrot upgrades that saves back-and-forth trips, and exposes the three traps that really stump farmers.
On Ginger Island, the currency isn't gold: it's golden walnuts. There are exactly 130 of them, scattered across exploration, fishing, farming, fossils, a handful of puzzles, and the Volcano Dungeon. A hundred of them unlock Mr. Qi's Walnut Room, a hundred and sixteen are enough to pay for the entire set of improvements offered by the parrots, and the last fourteen convert into 28 Qi Gems.
Yet the count is poorly documented in French. The French-language wiki only details part of the locations on the west side of the island and omits the two walnuts awarded by Professor Snail's investigations: adding up its tables, you get 104 walnuts instead of 130. Hence farmers convinced they've run into a bug when in fact they're simply missing a dozen bushes around the tiger slime grove.
Here is the real count zone by zone, the spending order that saves the most back-and-forth trips, and the three pitfalls that truly stand in the way of completing the collection.
Fixing Willy's boat before anything else
Access to the island goes through the back room of the Fish Shop. Once the Community Center has been restored and Willy's main quest is complete, he sends a letter that opens up a hidden dock where an old boat lies. Restoring it requires three sets of materials:
- the hull: Hardwood ×200;
- the ticket machine: Battery Pack ×5;
- the anchor: Iridium Bar ×5.
Each crossing then costs 1,000g, the trip back to the valley is free, and the Fish Shop opens at 8 a.m. once the boat is repaired. Above all, keep one thing in mind: when the Fish Shop is closed, only the Island Obelisk built on the farm — or an Island Warp Totem — can still get you to the archipelago. Over a hunt spanning several seasons, that's the difference between three trips a week and daily access.
The 130 golden walnuts, zone by zone
| Zone | Walnuts | What provides them |
|---|---|---|
| All zones | 6 | 5 from fishing, 1 from the first Golden Coconut cracked open by Clint |
| East (jungle, Leo's hut) | 11 | Trail bush, hut tree, banana shrine, jewel bird shrine |
| West (farm, beach, grove) | 52 | Island farm, Qi's Crop, tide pools, shipwreck, tiger slime grove, colored crystal puzzle |
| North (dig site, volcano) | 49 | Excavations, Island Field Office, Volcano Dungeon, Forge |
| South and Southeast (dock, pirate cove) | 12 | Hidden cliff, star-shaped pool, mermaid, darts |
| Total | 130 | — |
The west and north alone account for 101 of the 130 walnuts. In other words: as long as the giant turtle blocking the western passage hasn't moved and the bridge at the dig site hasn't been repaired, you're playing with access to less than a quarter of the total supply. That's what should dictate the order of purchases, not convenience.

33 walnuts that fall into your lap on their own
A third of the collection isn't something you have to hunt for: it triggers by probability, with a cap per activity. No need to devote entire days to it—just play normally on the island.
- Fishing: 5 nuts. Each cast, anywhere on the island, has a 15% chance of yielding one, until all five have dropped.
- Island Farm crops: 5 nuts. 5% per plant, only for crops that don't regrow and are harvested by hand or with the Iridium Scythe. Potatoes and melons work very well; the 879 tillable tiles to the west ignore seasons and crows, so no scarecrow is needed.
- Shell rocks: 5 nuts. 10% per mussel node mined in the tide pools to the southwest. This is the parrot's hint: "stuck in a rock covered in shells near the shore."
- Volcano Dungeon: 17 nuts. The biggest counter in the game, split into 5 for broken rocks, 5 for monsters killed, 5 for metal crates, 1 for a common chest, and 1 for a rare chest.
- Tiger Slime Grove: 1 nut by killing the slimes that respawn there every day.
Since the volcano alone accounts for a fifth of the total, there's no reason to wait: the descent only requires a watering can to carve a path through the lava, and the route resets every day as long as the permanent bridge hasn't been paid for.
36 nuts locked behind puzzles
These are guaranteed, but each one imposes its own condition. This is where most players get stuck, because three of them depend on the weather or the calendar.
- The Glutton — 15 nuts. The cave appears at the top right of the Island Farm once the old house has been renovated. The frog asks for a Melon, then Wheat, then Garlic, in that order. All three can be planted at the same time, but they must be left to fully grow without harvesting them, and you need to talk to the frog between each one: 5 nuts per plant.
- The Gem Bird Shrine — 5 nuts. On rainy days, a bird appears in one of the four zones and drops a gem, which must be placed on the pedestal matching that zone. The spawn points are fixed, and the island's weather is independent from the valley's: a Rain Totem used on-site forces rain the following day.
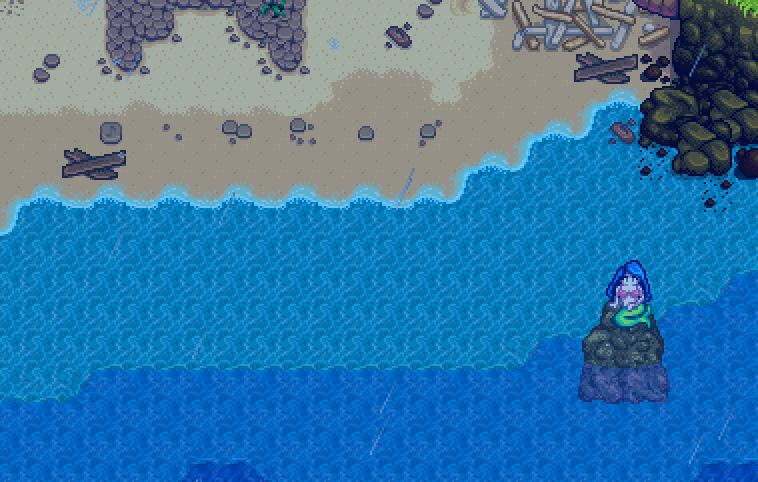
- The southeast mermaid — 5 nuts. On a rainy day, she settles on the rock offshore. Place a Flute Block under each of the five stone clusters, tune them to 2, 11, 9, 5, and 7 clicks, then walk the line from left to right.
- The banana shrine — 3 nuts. Place a Banana on the altar located to the left of the staircase leading to Leo's hut; a gorilla takes care of the rest.
- Pirate darts — 3 nuts. Only on an even-numbered day, with no rain, after 8 PM, in the pirate cave. One nut per round won, up to three times.
- The colored crystal puzzle — 3 nuts. A "Super Simon" of five rounds, getting faster each time, in the cave north of the Tiger Slime Grove. The game slows down after each failure.
- The tree in Leo's hut — 1 nut. Just chop the tree growing inside with an axe.
- The green mole — 1 nut. Block three of its four holes with placeable items, then hit it with an axe or pickaxe; an upgraded watering can lets you hit it from a distance without blocking anything.
Separately, the "Pirate's Wife" quest given by Birdie yields an additional 5 nuts as part of its reward.
The Island Field Office: 12 walnuts and the Ostrich Incubator
Professor Snail is trapped in a cave northeast of the dig site: a single Bomb clears the rocks. His tent then becomes the densest source of guaranteed walnuts on the island.
- Large Animal Skeleton — 6 walnuts and a Banana Sapling: Fossilized Leg ×2, Fossilized Ribs, Fossilized Skull, Fossilized Spine, Fossilized Tail.
- Snake Skeleton — 3 walnuts and a Mango Sapling: Snake Skull, Snake Vertebrae ×2.
- Mummified Frog — 1 walnut, obtained by cutting the jungle grass to the east.
- Mummified Bat — 1 walnut, by mining the rocks in the Volcano Dungeon.
- Both quests — 1 walnut each. The answers are 22 purple flowers and 18 purple starfish, with only one attempt per day.
The bottleneck is the Fossilized Skull: it only comes from opening a Golden Coconut at the Blacksmith. Collect them systematically and have them opened in batches. Completing all four skeletons and answering the quests also rewards the recipe for the Ostrich Incubator.
The 116 useful walnuts: what order to spend them in
| Upgrade | Cost | Why at this point |
|---|---|---|
| North access | 1 | Mandatory step, from the parrot at Leo's hut |
| West access | 10 | Opens the richest area (52 walnuts) |
| Island Farmhouse | 20 | Unlocks the Gourmet (15 walnuts) and a bed on site |
| Parrot Express | 10 | Removes on-foot crossings between the volcano, farm, and jungle |
| Dig site | 10 | Opens the fossils at the Field Office (12 walnuts) |
| Island Resort | 20 | Opens the southeast and the pirate cave: 11 walnuts as a reward |
| Volcano bridge | 5 | No more need to retrace a path through hot lava every day |
| Volcano emergency exit | 5 | Shortcut from level 5, for chaining descents |
| Island trader | 10 | Convenience: bartering exclusive items, no extra walnuts |
| Mailbox | 5 | Pure convenience |
| Farm obelisk | 20 | Pure convenience, the most expensive: save it for last |
Total: 116 walnuts. The logic is simple — pay first for what unlocks other walnuts, pay last for what only saves time. The Island Resort, often put off because it costs 20 walnuts for "decoration," is actually worthwhile: it alone gives access to the eleven walnuts of the southeast, including those from the mermaid and the darts.
Once the 116 have been spent, the 14 remaining walnuts can be exchanged in the Walnut Room at a rate of 1 walnut for 2 Qi Gems, i.e. 28 gems.
What the 100 walnuts actually unlock
The door to Mr. Qi's Walnut Room, north of Birdie's shack, opens on the hundredth walnut collected. Three things await behind it: the Perfection Tracker, the special orders board — two offers every Monday, only one selectable — and the vending machine that accepts Qi Gems. No Qi Gem can actually be obtained before this door opens, since both of their usual sources (Mr. Qi's quests and the Mine's hard mode) depend on it.
On the purchasing side, the items that really change a playthrough are: the Junimo Chest in pairs (30 gems), which pools all chests into a shared inventory, the Mini-Shipping Bin (60), the Galaxy Soul (40, needed three times to unlock the final form of the Galaxy Sword), Magic Bait ×20 (5), and Qi Seasoning ×10 (10).
Two side effects often go unnoticed. First, the Queen of Sauce Cookbook (50,000g) automatically appears in the Bookseller's stock once 100 walnuts have been found: it teaches every remaining Queen of Sauce recipe in one go. Second, the day after your first interaction with the Perfection Tracker, Mr. Qi's associate Fizz writes to you and moves into the mushroom cave at the archaeological site, where he sells "perfection waivers" for 500,000g each, each one worth 1% of perfection progress — the most cynical addition in version 1.6.
The three pitfalls that block the collection
The offset counter. In the calculation that opens the Walnut Room, the very first walnut collected doesn't count. You therefore need to find 101 walnuts for the door to open at "100". This isn't a bug — it's simply how the game behaves.
Unread journal scraps. Several buried walnuts will only surface if the corresponding journal scrap has already been read: scrap #4 for the sand north of Birdie's shack (which also yields a quality Driftwood), scrap #6 for the cliff corner southeast of the west beach, scrap #10 for the bent palm tree southwest of the volcano entrance. Digging before reading the scrap yields absolutely nothing, and the game gives no indication of the mistake.
The counter that lies. If the tracker stays stuck even though the map is empty, entering the /recountnuts command in the chat window recounts the save file. An accepted side effect: it restores nuts already converted into Qi Gems. And if the nut located north of the Nut Room has flown off-screen without being counted — a known bug —, the only recourse left is Joja's Golden Parrot.
Joja's Golden Parrot, the 10,000g emergency exit
Added with 1.6, this parrot perched west of the volcano recovers missing nuts for 10,000g apiece; they're added to your counter overnight. The game warns you point-blank that you're depriving yourself of the true Ginger Island experience, and it's true: at 130 nuts, the maximum bill exceeds a million.
Its reasonable use boils down to two cases. The first, a nut lost to a bug, which no manipulation can recover. The second, a long-standing save file you want to bring to 100% perfection without redoing three seasons of bush-scouring. For everything else, the parrot at Leo's hut is enough: it gives hints for 123 of the 130 locations, and only stops giving hints once all the nuts tied to the day's hint have been found on the same day.
The plan that works
An efficient hunt boils down to three waves. The first, day after day: pay for the north access then the west access, rake through the bushes and pebble circles of the four zones, and let the fishing and mining counters fill up in the background. The second, as soon as the Island Farm is renovated: plant a patch of potatoes for the 5 harvest nuts, kick off the Gourmet sequence, and chain volcano descents for its 17 nuts.
The third wave is conditional: keep a Rain Totem in reserve to trigger either the mermaid or the gem birds, and schedule the visit to the pirate cave on an even day after 8 p.m. The rest — fossils, quests, Golden Coconuts — can be handled in parallel without a dedicated day. With this organization, the 130 nuts fall in a season and a half rather than two years of play.
Share this article
Your biggest trap on Ginger Island: which one do you recognize?
Frequently asked questions
Why does the French-language wiki list 104 walnuts instead of 130?
It omits the two walnuts from Professor Snail's quests and only covers part of the western locations. The real zone-by-zone count is indeed 130: 65 by fishing, 33 free ones, 32 puzzles, and the rest through exploring every corner.
In what order should you buy the parrot upgrades to save on travel?
North access first (mandatory), then west access (unlocks the 52 walnuts in the west), then Island Farmhouse (unlocks Mr. Qi's Walnut Room, wait no, unlocks the Gourmand achievement), then Parrot Express. This order minimizes walking since the west and north together hold 101 of the 130 walnuts.
Does the Valley's weather affect the puzzles on the island?
No, the island's weather is independent. For puzzles that require rain (Gem Bird Shrine, Southeast Mermaid), craft a Rain Totem and use it on-site to force rain the following day.
How many walnuts do you really need to unlock the important content?
A hundred walnuts open Mr. Qi's Walnut Room, 116 pay for all the parrot upgrades in full, and the remaining 14 convert into 28 Qi Gems.
Why is the Fossilized Skull at the local Office a trap?
It only exists inside Golden Coconuts opened at Clint's. Without it, you won't complete the large animal skeleton and you'll lose six walnuts plus a Banana Sapling: always collect your Golden Coconuts and have them opened in batches.
Key takeaways
- The west and north together hold 101 of the 130 walnuts: repairing the west passage first pays off more than any other convenience
- Thirteen walnuts only drop on rainy days or on specific dates: ignore the Valley's weather and use Rain Totems on-site instead
- The Volcano Dungeon alone provides 17 walnuts and only requires a watering can: descending it as soon as possible pays off massively
- The local Professor Snail Office office delivers 12 guaranteed walnuts but requires the Fossilized Skull: always open your Golden Coconuts at Clint's
- A hundred walnuts unlock Qi's Secret Room, but you'll never reach 130 without exploring every corner and solving every puzzle
Comments
No comments yet. Be the first to react!
Leave a comment
Similar guides


Latest articles








Your opinion counts
Rate Stardew Valley
Click a star to rate