



 Fabian Lainé
Full Guide
Ghost of Yotei: the complete campaign walkthrough — the six targets of Atsu's Revenge, optimal order and mission-by-mission rewards (2026)
In brief
This complete walkthrough guides you through the six targets of Atsu's Vengeance in Ghost of Yotei. Discover the recommended optimal order to face each assassin, the concrete rewards unlocked mission by mission, and the essential tactics to defeat each boss without a headache.
Spoiler warning. This guide reveals the full identity of the Six of Yotei, the canonical order of the prologue and epilogue, as well as the campaign's final scene. If you haven't finished Ghost of Yotei yet, spin the weapon wheel, hop back on the wolf, and come back later.
Sucker Punch built Atsu's revenge as a non-linear open world: after a mandatory prologue, half of the antagonist cast opens up to the player, who decides for themselves in what order to hunt down their family's killers. Ezo, in 1603, is traversed on horseback, on foot, on wolfback, shamisen in hand, and each fallen target redistributes the dojos, weapons, allies and mechanics available to Atsu. Here is the complete narrative walkthrough of the campaign: the six of Yotei one by one, the recommended optimal order to smooth out the difficulty, and the concrete rewards each duel unlocks.
The six targets: general overview
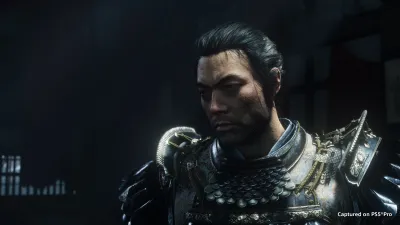
Atsu's lineage was wiped off the map during the Night of the Burning Tree, in 1587, by a band of six mercenaries allied with the renegade lord Nariaki Saito. As a child, Atsu watched her father Kengo, an Ezo blacksmith, die hanging from the family ginkgo tree. Sixteen years later, she returns to Hokkaido with a sashimono (the banner samurai carry on their backs) embroidered with the six names she must cross off. The people of Ezo, unable to name her, call her onryo — the vengeful spirit of Japanese folklore.
Here are the six faces Atsu must cross paths with throughout the campaign:
- The Snake (Yukiharu) — a fallen mercenary, notorious drunkard, found in a remote village. This is the prologue's target, imposed by the story.
- The Oni (Lord Hyozo) — the group's heavy hitter, holed up in Ishikari Castle where he rules over a garrison of Matsumae guards.
- The Kitsune (Dojun) — the group's fox, a poisoner who industrialized the production of wolfsbane on Saito's behalf.
- The Spider (Sakichi) — Nariaki Saito's younger son, a performer who turned the Night of the Burning Tree into a traveling play.
- The Dragon (Ukichi) — Saito's eldest son, a wary man who constantly moves his camp to escape assassins.
- Lord Nariaki Saito — the band's leader, the mandatory final boss, holed up on the very lands of the blacksmith Kengo.

Recommended optimal order: increasing difficulty and rewards
The Snake and Saito are locked in place: the former opens the game, the latter closes it. The four central targets (Oni, Kitsune, Spider, Dragon), however, can be hunted in the order of your choice. In practice, the order we recommend to smooth out the difficulty curve and logically chain weapon unlocks is as follows:
- The Snake (mandatory prologue) — you start with the katana.
- The Oni (Ishikari) — the first major infiltration, which pits you against thugs armed with maces and tetsubō. The ōdachi then becomes essential, which makes it worth visiting Master Yoshida's dojo in the Tokachi range just before.
- The Kitsune (Teshio Ridge) — this narrative arc introduces an ally-mentor and unlocks the shinobi stance. Stopping by Master Enomoto's dojo to master the kusarigama just beforehand lets you turn the tables on Dojun's shield-guards.
- The Spider (Southern roads) — the theater scene demands agility and short combos. This is the right time to go pick up the dual katanas from the appropriate sensei, the top weapon against Sakichi's ashigaru spearmen.
- The Dragon (Sarufutsu / lighthouse) — Ukichi hides behind a highly mobile guard and a small army of arquebusiers. Sensei Takahashi's yari (Modaiwa) gives you the reach needed to pierce through his line of guards, and the tanegashima recovered in "The Storm Breaks" significantly shortens the final duel.
- Lord Saitō (Mount Yōtei) — the final duel opens up after crossing off the other five names on the sashimono.
Of course, nothing stops you from finishing the Dragon before the Spider, or killing the Oni last among the four — the only real rule is to save Saitō for last, since his lair is what locks access to the epilogue.
Target 1: The Snake (Yukiharu) — the prologue of vengeance
Yukiharu is the only one of the six who no longer really serves Saitō in 1603: he's a washed-up mercenary, an alcoholic, holed up in an inn in a fishing village. The prologue strings together the katana tutorial, the first parry window (blue glint on L1), the first red dodge prompt on Circle, and the Resolve mechanic that fuels both your counters and your emergency healing.
Tactics. Yukiharu staggers and favors wide swings. Land a perfect parry on his first blue glint, break his guard with a heavy attack (Triangle), follow up with two light attacks (Square), back off, repeat. He has no devastating red attack: the duel is designed to teach you the rhythm, not to punish you.
Reward. Atsu suffers mortal wounds and is only saved at the last moment by a stranger. The prologue concludes with the handing over of the sashimono, the unlocking of the wolf and its Wolf's Song on the shamisen, the map opens up to Ezo, and the other five targets are marked as accessible.
Target 2: The Oni (Lord Hyozo) — the Ishikari dungeon
Hyozo is a colossus in lamellar armor who has set up his garrison in Ishikari Castle, a few leagues from Mount Yōtei. His Matsumae militia keeps prisoners in the cellars — this is the entry point of the story: Atsu finds her brother Jubei, whom she believed dead, now embedded within the samurai ranks.
Prerequisite. Visit Master Yoshida's dojo in the Tokachi range to learn the ōdachi. It's the officially recommended weapon against the garrison's thugs, and it shines in the dungeon's narrow corridors.
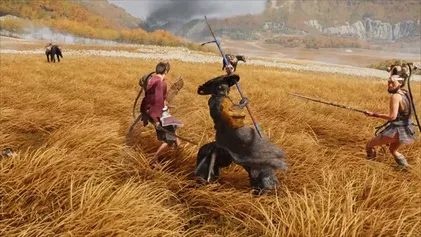
Tactics. The infiltration unfolds in three stages: inciting the prisoners to riot to create chaos, setting fire to the west tower to cut off reinforcements, then a final duel against the Oni in the courtyard. Hyozo chains two red glints in a row (dodge with Circle then dodge back again), followed by a long blue glint that must be perfectly parried to break his guard. Systematically switch to the ōdachi when he charges with both hands, then go back to the katana to land your post-parry combos.
Reward. The Tokachi chain is pacified, several hot springs become accessible, Jubei permanently joins the story, and Ishikari Castle remains an inn and forge hub after the mission.
Target 3: The Kitsune (Dojun) — the wolfsbane poison
The Kitsune is a special case: the person the legend originally referred to by that name, Oyuki, an itinerant shamisen player, is no longer in that role. She saved young Atsu on the night of the massacre and was betrayed by her own disciple, Dojun, who took over the title and industrialized the production of wolfsbane (the wolf-killing poison) on behalf of Saitō.
Prerequisite. Take a detour to Teshio Ridge to learn the kusarigama from Master Enomoto. The chain-sickle is the direct counter to the shields carried by Dojun's henchmen.
Tactics. The Kitsune's arc chains together a nighttime infiltration, tracing back the poison distribution network, then a reunion with Oyuki, who becomes the chapter's ally-mentor. Dojun fights with a poisoned tantō: his yellow glints must be interrupted with Triangle, or you'll suffer a damage tick lasting several long seconds. Always keep a full Resolve gauge ready to heal after taking a hit.
Reward. Oyuki teaches Atsu shinobi techniques (kunai, smoke bombs, climbing rope), which unlock the entire "Onryō" skill tree. The Teshio wolf dens open up, the Wolf's Song gains a variant, and shield guards stop being an impassable wall across the rest of the map.

Targets 4, 5, and 6: the Saitō sons and the patriarch
The second half of the campaign tightens the story around the Saitō clan itself. The two sons, the Spider and the Dragon, are preparing for the final duel: each reveals a part of the Night of the Burning Tree that Nariaki refuses to publicly acknowledge.
The Spider (Sakichi) — the theater trail
Sakichi leads a troupe of traveling performers who reenact the burning of Atsu's parents' forge as a grotesque play. The quest plays out as a tail: following the troupe from scene to scene, eliminating the guards surrounding it at each stop, until Sakichi is isolated in his dressing room.
Tactics. Sakichi is a fast duelist who fights with dual katanas — all the more reason to master the style yourself in order to read his feints. His yellow glints come in bursts of three: interrupt the first with Triangle and dodge the next two with Circle. He won't break your guard as long as Resolve is full.
Reward. Atsu can choose to spare him or finish him off — the canonical version has her let him go free after he reveals the location of the Saitō clan graveyard. This choice unlocks an additional chapter of the "Revenge" tree and opens up a series of side objectives around Sarufutsu.
The Dragon (Ukichi) — the lighthouse ambush
Ukichi is the most paranoid of the six: he changes camp several times a day and finally holes up in the Sarufutsu lighthouse, covered by arquebusiers. This is where the tanegashima obtained in "The Storm Breaks" really comes into its own: it lets you take out the shooters positioned up high before the main assault.
Prerequisite. Unlock Sensei Takahashi's yari at Modaiwa (south of the Ishikari Plain). The spear's reach is the direct counter to the Dragon's highly mobile guard.
Tactics. Ukichi fights with the ōdachi but retreats a lot, forcing Atsu to close the distance quickly. Constantly switch between the yari (Square + Square + Triangle to pierce his guard) and the bow (hold R2 to line up the shot). The second phase plays out in the rain on the lighthouse's outer walkway: every parry is razor-thin and the red glint of his spinning attack is very wide, so make sure to dodge backward.
Reward. Sarufutsu is pacified, Jubei returns to the story with new dialogue, the "Wolf" tree comes to an end, and the Dragon's name disappears from the sashimono. Only Nariaki's remains.
Lord Nariaki Saitō — the ginkgo duel
The final boss is locked until the other five have fallen. The mission of Mount Yōtei's shadow sends Atsu back home, to blacksmith Kengo's land, at the foot of the ginkgo tree where her father was hanged sixteen years earlier. Jubei accompanies her one last time.
Tactics. The duel opens as a three-on-two (Atsu and Jubei against Saitō and his personal guard). Jubei is fatally wounded after the first phase — after which the duel becomes a pure one-on-one. Saitō fights with a katana using the same glint vocabulary as Atsu (perfect parry on blue, interrupt on yellow, dodge on red), but with a parry window roughly half as long. The Talisman of Futsunushi, recovered at the Sanctuary of the Faithful Leap (northwest of Tokachi), widens that window enough to make the perfect parry executable.

Final reward. Atsu disarms Saitō and pins him to the family ginkgo with his own blade and Nariaki's — rather than finishing him off, she leaves him at the tree. The epilogue moves through Jubei's funeral, the return of the sashimono to Kengo's shrine, one last ride with the wolf, and the end credits. The save then switches to a "post-revenge" mode where all regions remain accessible to complete the collectibles.
Final thoughts
Ghost of Yotei doesn't hide the fact that it's a narrative game before being an open-world game: every fallen target changes the world, unlocks a weapon, closes a chapter. By following the optimal order Oni → Kitsune → Spider → Dragon, you open the four main dojos at the right time, you pick up each weapon just before the duel that showcases it, and you save Saitō for a confrontation where all the mechanics have been mastered. The only real trap is rushing the two sons without having unlocked the kusarigama: Dojun and his shield-guard then become very punishing. Good vengeance in Ezo.
Share this article
What's your style for taking on the six targets?
Frequently asked questions
What is the mandatory order of the six targets?
The Snake (prologue) and Saitō (finale) are narratively locked. The four in the middle (Oni, Kitsune, Spider, Dragon) are free, but the recommended order follows the difficulty curve: Oni, Kitsune, Spider, Dragon, to chain weapon unlocks logically.
Do you really need to visit the dojos before each target?
Technically no, but it's genuinely recommended. Each dojo unlocks the weapon that trivializes the following fight: the odachi for the Oni, the kusarigama for the Kitsune, and so on. Without it, you'll struggle needlessly.
Does the Kitsune change between Oyuki and Dojun in the story?
Yes, it's a major twist: Oyuki, the real shamisen player, saved Atsu as a child and was replaced by her own disciple Dojun, who took the title and industrialized the poison. Oyuki becomes your mentor ally after her mission.
What is Resolve and how do you use it?
Resolve is your special gauge that fuels both your perfect parries (L1 on the blue glint) and your emergency healing. Always keep a full gauge before a duel; it becomes critical against the Kitsune's poisoning.
Key takeaways
- The Snake and Saitō are mandatory, the four central targets can be chained in whatever order you choose to smooth out the difficulty curve.
- Each boss unlocks weapons, mentor allies, and skills that radically transform your gameplay for the rest of the campaign.
- The odachi becomes essential against the Oni, the kusarigama against the Kitsune, the yari against the Dragon: each duel demands its own signature weapon.
- The prerequisites at each dojo (Yoshida, Enomoto, Takahashi) aren't optional if you're aiming for smooth progression without pulling your hair out.
Comments
No comments yet. Be the first to react!
Leave a comment
Similar guides



Latest articles








Your opinion counts
Rate Ghost of Yotei
Click a star to rate