



 Fabian Lainé
Full Guide
Ghost of Yotei: The Combat Stances and Parry Guide — Mastering the Five Weapons and Countering Every Enemy Type (2026)
In brief
Ghost of Yotei overhauls the combat system by replacing stances with five distinct weapons: katana, dual katanas, ōdachi, yari, and kusarigama. Each excels against a specific type of enemy, and mastery hinges on perfect parries, dodge timing, and managing weapon swaps mid-fight to exploit each opponent's weaknesses.
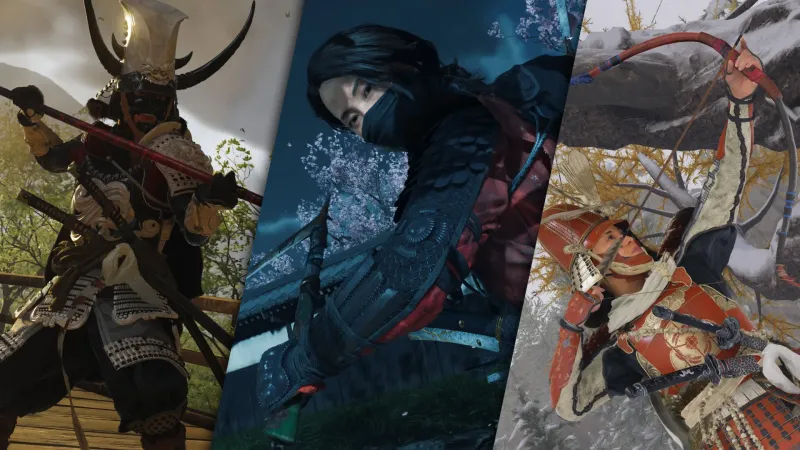
Two years after Tsushima, Sucker Punch has done away with Jin Sakai's Stone, Water, Wind, and Moon stances to replace them with five tangible weapons, each with its own choreography, reach, and preferred enemy. Atsu wields the katana, the ōdachi, the dual katanas, the kusarigama, and the yari in turn, and combat now hinges on a rock-paper-scissors of weapons combined with a demanding perfect parry. Here's how to master the five styles, when to switch from one weapon to another, and how to break the guard of each type of enemy in Saitō's army.
The five weapon-stances of Ghost of Yotei
The studio's guiding idea is simple: instead of changing style with the same sword, Atsu switches weapons entirely. On the DualSense controller, you switch using the directional pad, often with a brief slow-motion effect that gives you time to choose your response to the enemy in front of you. The five blades are unlocked over the course of the main campaign and a few optional sensei quests.

Katana — the all-purpose duelist's weapon
Maximum effectiveness against: duelists armed with a katana (samurai and ranked ronin). The katana remains Atsu's default weapon, the one she starts every skirmish with. Its standard chain alternates light attacks (Square) and heavy attacks (Triangle) to open up and then break the guard. Its true domain is the duel: against another sword, its counters and feints reduce the enemy's window to strike back. On ashigaru equipped with a short katana, two or three exchanges are enough to break their stance before the execution.
Dual katanas — the spearman shredder
Maximum effectiveness against: spearmen and yari wielders, some aggressive ronin. Two blades, doubled speed, short reach: the dual katanas earn their keep against spearmen by sticking close to the enemy to prevent them from using their reach. Combos go up to nine chained strikes, with a spinning attack that interrupts charges. You draw them as soon as a yari wielder takes the initiative within a group.
Ōdachi — the brute breaker
Maximum effectiveness against: brutes armed with axes or clubs, large armored enemies. The great two-handed sword is slow, but every hit drops the stagger bar by a notch. Its heavy attacks pierce through standard guards and deal crushing damage to Saitō's army's brutes, those giants with unblockable red attacks. Its weak point: speed. In tight groups, you have to alternate with perfect dodges to recycle the attack window.
Yari — Atsu's compass
Maximum effectiveness against: kusarigama and dual sickle wielders, skirmishers. The spear is used to enforce distance. Its attacks push the enemy out of range of their chain, and a charged strike (Triangle held) pierces the guard of sickle-wielders who try to close back into melee range. The yari can also be thrown to eliminate an isolated archer — a very economical trick against ambushes on Mount Yōtei. The devastating kick unlocked later breaks enemy dodges.
Kusarigama — the shield-breaker
Maximum effectiveness against: ashigaru armed with the tedate shield, tight groups. The chain sickle is the only weapon that tears through the small rectangular shields carried by foot soldiers. Its heavy attacks break guard in two hits, its reach hits multiple targets simultaneously, and its chain assassination ability lets you pull in a distant enemy for a silent kill. In a crowded camp, you can also set the chain alight to apply damage over time.
Parrying and the perfect counter
Sucker Punch has made parrying much more punishing than in Tsushima. Three reads coexist in combat:
- Simple block (L1 held): reduces damage, but consumes Atsu's posture.
- Standard parry (L1 pressed at the right moment): cancels the attack, with no counter offered afterward.
- Perfect parry (L1 within a tight window just before impact): cancels the attack and opens a devastating counter-riposte window.
On Normal difficulty, the window is comfortable; on Hard and especially Lethal, it drops to just a few frames. We detailed elsewhere how to extend the window via Custom Difficulty and the Immortal Samurai or Bounty Hunter armors.

Not every attack can be parried. Red attacks — often those of brutes wielding an ōdachi or axes — must be dodged: pressing Circle at the right moment triggers a perfect dodge, with the same counter-attack reward as a perfect parry. Several armors also extend this dodge window, which quickly becomes essential on Lethal.
Finally, fully breaking an enemy's posture no longer systematically leads to an execution. On mini-bosses and ranked duelists, it instead triggers a standoff: hold Triangle, watch the opponent's back foot, and release as soon as it lifts. Perfect timing = a killing blow. Missed timing = you take a hit and lose posture.
Counter table: which weapon for which enemy
Here is the weapon/enemy matchup table as applied by the weapon alignment system: when you engage with the right weapon, stagger damage increases, the opponent's guard breaks faster, and several armor sets additionally activate their survival and focus bonuses.
| Your weapon | Targeted enemy | Distinctive signs |
|---|---|---|
| Katana | Katana-wielding samurai and ronin | A sheathed blade, upright posture, quick feints |
| Dual katanas | Spearmen (yari, naginata) | Long shaft, thrusting attacks and sweeps |
| Ōdachi | Axe or club-wielding brutes | Large build, mostly unparryable red attacks |
| Yari | Reapers (kusarigama, dual sickles) | Chain at the side, wide circular attacks |
| Kusarigama | Ashigaru with tedate shield | Rectangular wooden shield, line formation |
The game offers an additional clue, often overlooked: advanced enemies visibly carry their secondary weapons on their backs. If a ronin suddenly draws a tedate in the middle of a duel, that's the signal to switch to the kusarigama via the directional pad before he takes cover. Ignoring this detail means turning a ten-second clash into a needlessly risky one-minute fight.
The yumi bow and the tanegashima: ranged combat
Ranged combat relies on two complementary weapons, plus kunai as an interruption tool.
The yumi bow uses L2 to aim and R2 to fire. Holding L2 triggers focus, which briefly slows down time, allowing you to line up a lethal shot on a perched archer — perfect for defusing an ambush before it starts. Fire arrows, unlocked through dojos, take out tightly packed groups by spreading flames across the tatami mats.

The tanegashima, the firearm introduced in Yotei, changes the game against brutes. A charged shot brings down an armored enemy in a single bullet, but each shot has a long reload time: use it on tough targets between melee exchanges, not as your main weapon. Against the Six, always keep a bullet in reserve to open a standoff during a difficult phase.
Finally, kunai (on the wrist, held R1) serve as an interruption tool. Three fire kunai thrown into a brute's charge cancel its attack and apply damage over time. Against an archer, a single kunai is enough to snuff out the shot before it's fired, without consuming your focus gauge.
Chaining weapon, focus, and tattoo: three advanced combos
The real skill ceiling of Ghost of Yotei lies at the intersection of weapon + focus + tattoos. The latter replace the classic talent tree and stack permanently: a recovery tattoo heals upon breaking a guard, a deflection tattoo restores health after every perfect parry, a focus tattoo recharges the gauge with every execution. Three combinations scale in power particularly quickly.

Combo 1 — Kusarigama, deflection, and focus. You engage a shield-bearing group by dragging the flag-bearer in with the chain, parry the first counterattack, the deflection tattoo instantly restores the health lost, and L2 focus triggers a ranged execution on the archer left behind. Ideal against a tight camp of ten ashigaru.
Combo 2 — Dual katanas, perfect dodge, and focus. Against a ranked spear-wielding ronin, you open with a perfect dodge, chain into the signature nine-hit combo, break their posture, and finish with an execution. The focus tattoo recharges the gauge with every execution, extending the chain into the next camp without any downtime.
Combo 3 — Ōdachi and tanegashima. Against an elite brute, first fire the gun to open, immediately switch to the ōdachi via the directional pad (the slow-motion gives you time), land two heavy attacks that break the remaining guard, then finish with a ground execution. The brute dies in under six seconds, without ever getting the chance to launch its unblockable red charge attack.
In summary
Ghost of Yotei's combat system rewards observation before aggression. Get into the habit of scanning for the secondary weapons visible on enemies' backs, keep the directional pad ready to switch between styles, and save the perfect parry for high-risk exchanges rather than trying to pull it off on every hit. Once this matchup logic clicks, the main campaign's duels become almost choreographed — and the six warlords, each tied to a signature weapon, play out like a final exam where you need to show up with the right counter in hand. Round out this feature with our guides on the 2026 starting guide, Atago's bamboo strikes, and the detailed parry timing breakdown.
Share this article
Which weapon appeals to you most for facing Saitō's enemies?
Frequently asked questions
Which weapon should I prioritize early on?
The katana remains your anchor: it's the default weapon and it excels against samurai and single-blade ronin. As you unlock the other weapons through sensei quests, you'll learn when to switch based on the type of enemy in front of you.
Is the perfect parry mandatory to progress?
On Normal, no. But starting from Hard, and especially on Lethal, it becomes essential. The window shrinks drastically, and learning to respect it is the difference between a mastered duel and a bloodbath where you get torn apart.
How do I recognize an enemy carrying a secondary weapon?
Watch their back: if a ronin is carrying a tedate shield or a visible yari before engaging, that's your cue to prepare your weapon swap via the D-pad. The game shows you, but it's easy to miss if you're rushing.
Can the kusarigama really break tedate shields?
Yes, that's its specialty. The chain sickle is the only weapon that shreds small rectangular shields in two heavy attack hits, which makes armored ashigaru formations far less of a problem.
Is the tanegashima really worth using?
Against brutes wielding an axe or a mace, yes: a charged shot drops them in one bullet. But the reload is slow, so it's best used between close-range exchanges, never as your main weapon. Keep one shot in reserve against mini-bosses to open up a standoff.
Key takeaways
- Each weapon is a specific counter: dual katanas against spearmen, ōdachi against brutes, kusarigama against shields.
- The perfect parry demands a tight window on Hard and Lethal, but it opens up a devastating counterattack if you nail the timing.
- Unblockable red attacks require a perfectly timed dodge: ignoring this mechanic drags out duels unnecessarily.
- Switching weapons via the D-pad can trigger a slow-motion effect that gives you time to react to the enemy's movements.
- Kunai and the tanegashima round out close-quarters combat by giving you access to interrupts and ranged damage without consuming your focus gauge.
Comments
No comments yet. Be the first to react!
Leave a comment
Similar guides




Latest articles








Your opinion counts
Rate Ghost of Yotei
Click a star to rate