



 Alexandre Jollier
Silent Hill f Wall Mural: The Puzzle Solution
In brief
The mural puzzle in Silent Hill f is one of the most complex in the game, requiring you to place three symbolic emblems in nine available slots. This article offers detailed solutions depending on your difficulty level and the ending you're pursuing, explaining how poetic clues and storytelling help you solve this unforgiving puzzle.
The wall mural puzzle in Silent Hill f is probably the hardest in the game. Located in the late stages of the adventure, this trial will test your patience and your powers of observation. This article will help you solve this particularly tricky puzzle, no matter which difficulty you've chosen.
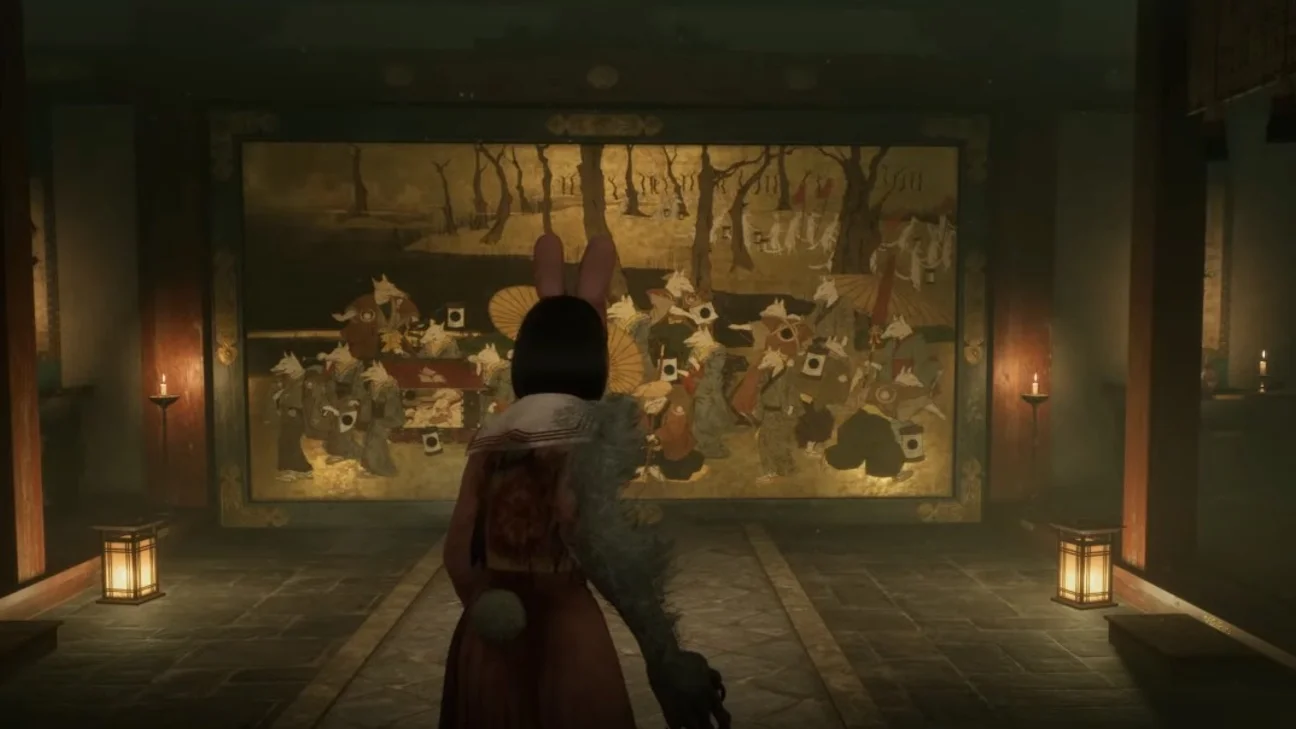
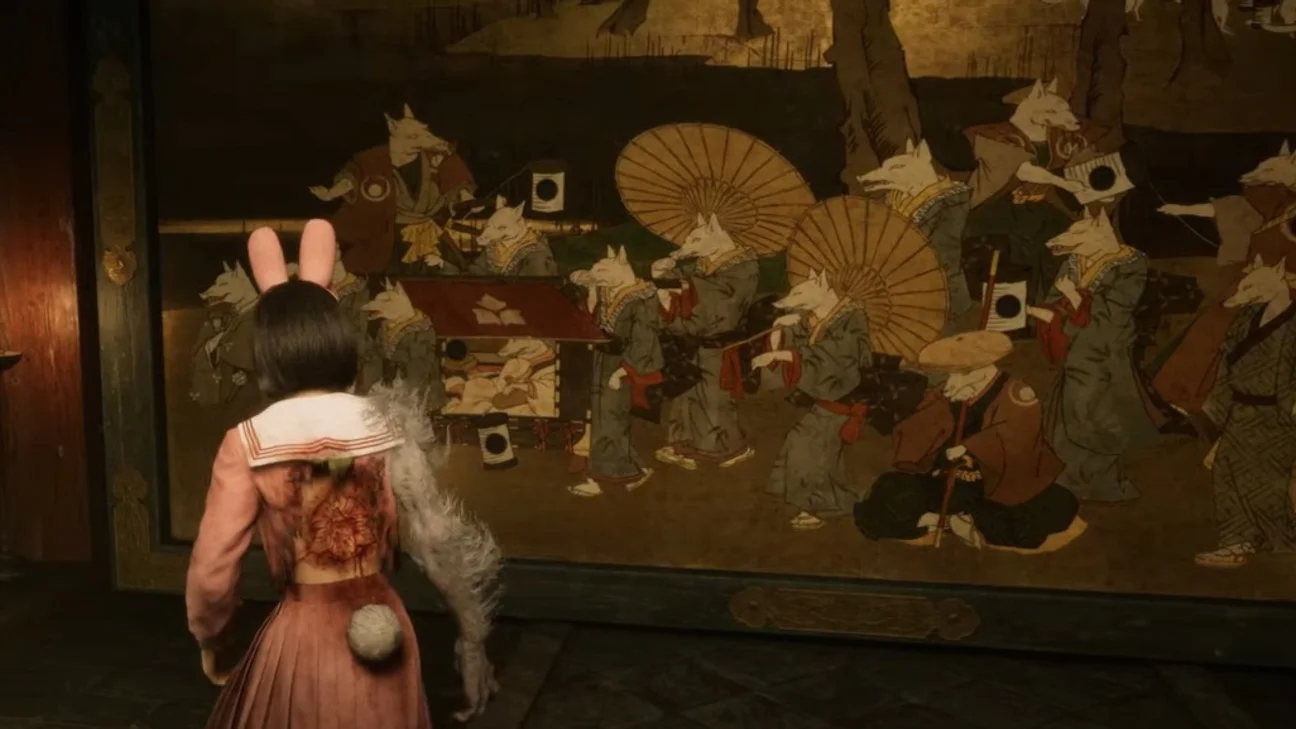
The goal here is to place three emblems - the Fox Mask Emblem, the Black Sparrow Emblem and the White Sparrow Emblem - into nine available slots on the wall mural. What makes this puzzle unique, both in substance and form, is that you cannot go back on your choices: either the solution is entirely correct and the mural disappears, or nothing happens.
Mechanics and clues for the wall mural puzzle
The puzzle's principle stays the same regardless of the level, but the clues become increasingly metaphorical and tied to the plot as the difficulty increases. Your only clue is found on the wall to the left of the mural, namely a short poem that tells you what to choose.
Note
A key point to keep in mind: the solution to the wall mural puzzle can vary greatly from one playthrough to another, even when two players choose the same difficulty settings. This is because the puzzle adapts its solutions to the ending you're heading towards. It's estimated that there are potentially twelve different solutions, corresponding to the four possible endings for each of the three difficulty levels.
The mural itself actually tells a veiled story about Hinako herself and what she ultimately becomes. Understanding this narrative dimension will help you shed light on the poetic clues.
Solutions by difficulty level and ending
Story Mode
Ending #1
"The Black Bird wishes to capture the White Bird. The White Bird tries to resist. The Fox advances triumphantly with its disciples. It does not notice the two birds in conflict."
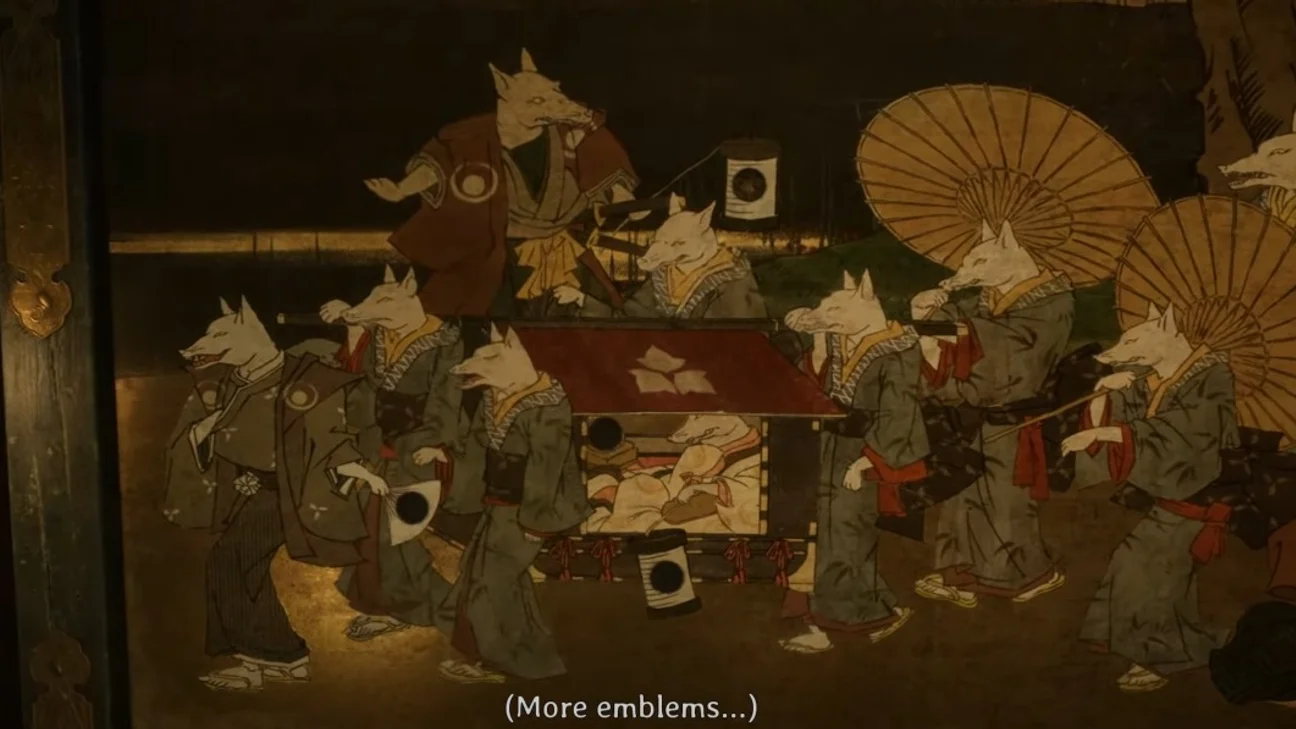
Solution: Place the Fox Emblem in the leader's fan, the only character followed by others. The other two emblems go in the slots of the two foxes on the right fighting over a lantern. The White Sparrow Emblem goes in the slot on the back of the empty-handed fox, while the Black Sparrow Emblem goes in the lantern of the fox to its left.
Ending #2, #3, #4: Solutions currently being discovered.
Hard Mode
Ending #1: Identical to the Story Mode solution for the same ending.
Ending #2
"The Black Bird is finally caged. The satisfied Fox unfolds its fan. The White Bird remains stunned. Everything was swept away while it slept."
Solution: The Fox Mask Emblem must be inserted in the leader's slot, the only one with a fan. The Black Sparrow Emblem, now caged, goes in the lantern under the carriage, while the White Sparrow Emblem belongs to the confused-looking monk sitting on the ground.
Ending #3, #4: Solutions currently being discovered.
Lost in the Fog Mode
Ending #1: Solution currently being discovered.
Ending #2
"The White Bird flies freely from its cage. Its shadow follows closely behind. The Fox raises a lantern watching them fly away. It can do nothing more now."
Solution: The White Sparrow Emblem goes in the lantern of the fox at the bottom right of the mural. The Black Sparrow Emblem goes in the lantern of the fox to its left; these are the only two foxes actively fleeing. The Fox Mask Emblem goes on the other side of the mural, in the lantern of the fox atop the carriage looking in the general direction of the first two.
Ending #3: Solution currently being discovered.
Ending #4
"Two chicks confide in each other within their shells. A Fox watches over them by the light of its lantern. No one knows when, or even if, the eggs will hatch. Not even the chicks themselves."
Solution: Insert the Black Sparrow Emblem in the slot on the side of the carriage and the White Sparrow Emblem in the lantern just below. The Fox Mask Emblem goes in the lantern of the fox sitting atop the carriage.
Share this article
Did you solve the mural puzzle on your first try?
Frequently asked questions
Why does the puzzle solution change between my playthroughs?
The puzzle adapts to the ending you're heading toward. There are twelve different solutions corresponding to the four possible endings for each of the three difficulty levels.
What happens if I place the emblems incorrectly?
There is no correction possible: either the solution is entirely correct and the mural disappears, or nothing happens and you have to start over from scratch.
Where can I find clues to solve the puzzle?
The main clue is found on the wall to the left of the mural, in the form of a short poem. Understanding the mural's story and what it reveals about Hinako also helps you interpret these clues.
Does the difficulty level change the puzzle's mechanics?
The principle remains the same at all levels, but the clues become progressively more metaphorical and tied to the plot as the difficulty increases.
Key takeaways
- The mural puzzle has up to twelve different solutions depending on the difficulty level and the chosen ending.
- The three emblems to place (Fox, Black Sparrow, White Sparrow) must be placed correctly all at once: no correction is possible.
- A poem engraved on the wall to the left of the mural gives you clues to solve the puzzle, but these become more metaphorical at higher difficulty levels.
- The mural tells a veiled story about Hinako and her evolution; understanding this narrative dimension is key to unlocking the solution.
- The solutions vary from one playthrough to another because the puzzle dynamically adapts to the ending you're heading toward.
Comments
No comments yet. Be the first to react!
Leave a comment
Similar guides
Latest articles








Your opinion counts
Rate Silent Hill f
Click a star to rate