



 Fabian Lainé

Full Guide
NTE Neverness to Everness: the 5 best meta teams (2026)
In brief
The 1.2 patch "999 Nights" shifts NTE's meta around five major compositions: Shinku Cosmos Burst dominates short phases, Chaos Lakshana Sustain reigns over endurance content, Nanally Blossom AoE blows casual farming out of the water, Lacrimosa DoT Nightmare dismantles armored bosses, and Iroi Hybrid Support finally unlocks a true buffer. Every team exists in a viable F2P version.
Two years after its global launch, NTE Neverness to Everness is reaching a decisive turning point. The 1.2 "999 Nights" patch, rolled out in mid-July 2026 by Hotta Studio, deeply reshuffles the competitive meta of Perfect World's urban action-RPG: the arrival of Shinku as an S-class Cosmos character, the appearance of Iroi as the roster's first pure support, the full opening of the Warren continent, and the launch of the Scarborough Fair. As a result, several squads that were still dominating the rankings in June have been brutally demoted, and the meta now revolves around new elemental loops that are faster and more technical.
This guide reviews the five best-performing squads of the current patch, tested across the reference endgame modes: Beyond the Rails, City Endurance, Anomaly Hunts, and event bosses. For each team, you'll find the four-character composition, the targeted elemental synergy, a four-step rotation, concrete use cases, and, above all, F2P alternatives to approach the same efficiency without limited summons.
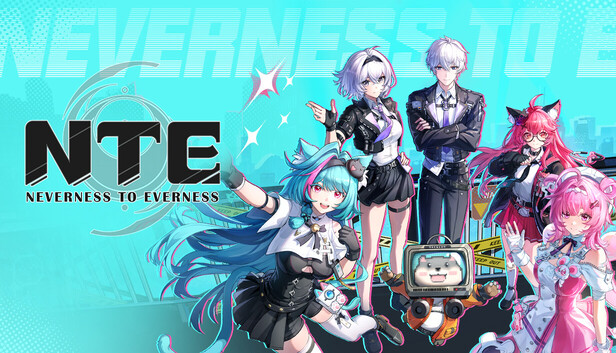
The 1.2 "999 Nights" patch shakes up the meta
Version 1.2 introduces six major new pieces of content: the fully playable Warren continent, the Scarborough Fair, Fishing Frenzy, Hide-and-Seek of Shadows, the Eibon Partner Program, and two consecutive limited banners. The roster grows to 19 playable characters (13 female, 6 male), with two additions in the S class: Shinku, a Cosmos burst DPS who multiplies finisher damage through an "empowered" state activated by her Ultimate, and Iroi, the first truly dedicated team-buff support.
This change breaks the previous balance: until now, the meta favored long-duration on-field DPS types like Chaos or Nanally. With Shinku's arrival, "swap-and-burst" rotations become viable again for the short windows of unique bosses in Anomaly Hunts. Conversely, endurance compositions benefit from an indirect buff, since Iroi finally unlocks a true dedicated ATK amplifier that was previously placed on hybrid characters like Haniel.
The four roles and the logic of a squad
Before diving into the compositions, a reminder of the structure. An NTE squad always consists of four characters embodying four specific roles:
- Main DPS — stays on the field for most of the fight, producing 60 to 80% of the final damage.
- Sub-DPS — steps in for short windows to trigger elemental reactions or stack markers.
- Support / Buffer — applies ATK buffs, delivers CC, and extends marker duration.
- Survival — heals, casts shields, or shares incoming damage.
The strength of the system rests on the Esper Cycle, a shared gauge that triggers one of eight elemental reactions: Blossom (area Vita Pistils), Remora (amplification marker), Charge (accelerated Ultimate recharge), Stain (Lakshana taint), Scorch (DoT burn), Nova (burst trigger), Discord (multiplier against the Break bar), and Nightmare (DoT stacking unique to Lacrimosa). The entire meta hinges on the ability to stack these reactions within the right window.
Shinku Squad — Cosmos Burst: the star of patch 1.2
Composition: Shinku (S, Cosmos, DPS), Hathor (S, Anima, Remora sub-DPS), Jiuyuan (S, Lakshana, Charge sub-DPS), Esper Zero (A, Chaos, Esper Cycle support).
This has been the team to beat since the patch dropped. The Cosmos + Anima + Lakshana trinity creates an almost permanent Remora → Charge loop, which guarantees Shinku a ready Ultimate gauge for every window. The result: she chains Cosmos finishers on a short tempo, ideal for the limited vulnerability phases found on unique bosses in the Anomaly Hunts.
Four-step rotation
- Hathor: applies Remora then charges her feathers off-field.
- Esper Zero: triggers the Esper Cycle to buff the next swap.
- Jiuyuan: holds his Skill to group up targets and stack Charge.
- Shinku: Skill, then Ultimate as soon as the gauge is full; chains Cosmos finishers until it recharges.
Use case: unique bosses in Anomaly Hunts, DPS check phases of City Endurance, short setups in Beyond the Rails.
F2P version — replacements: Shinku → Chiz (free S-tier class, Incantation DPS), Hathor → Mint (A-tier class, Chaos sub-DPS), Jiuyuan → Skia (A-tier class, applies Remora in Lakshana); Esper Zero, the free protagonist, is kept. The team sacrifices 30 to 40% burst but keeps the Remora/Charge loop intact.
Chaos Squad — Lakshana Sustain: the long-haul butchery
Composition: Chaos (S, Lakshana, DPS), Hathor (S, Anima, Remora extension), Esper Zero (A, Chaos, cycler), Haniel (A, Psyche, buffer).
The exact counterpart to the Shinku squad: here, the goal is to stay on the field for 80% of the fight with Chaos, who marks each target to stick a permanent damage bonus on them. Hathor extends Remora, Haniel provides a very cost-efficient global ATK buff, and Esper Zero handles fast swaps as well as residual healing. This is the go-to for anything lasting more than two minutes.
Four-step rotation
- Haniel: Skill to place the global ATK buff.
- Esper Zero: Esper Cycle to open the offensive window.
- Hathor: applies Remora and extends its maximum duration.
- Chaos: stays on the field, spamming Skill + Ultimate as long as the Remora mark holds.
Use case: Beyond the Rails (sustained rotations), City Endurance (multiple waves), bosses with a long Break Bar.
F2P version: Chaos → Baicang (S-tier class, multi-mode Anima DPS), Hathor → Adler (A-tier class, Anima buff and shield). Haniel and Esper Zero are kept. Baicang scales less in burst but offers self-healing that makes the whole team ideal for extended solo play.

Nanally Squad — Blossom AoE: the auto-pilot for farming
Composition: Nanally (S, Anima, DPS), Sakiri (S, Cosmos, buffer / AoE CC), Jiuyuan (S, Lakshana, sub-DPS), Esper Zero (A, Chaos, cycler).
If you're looking for a team you can activate without thinking to farm dailies or wipe out a pack of enemies on the fly in open world, this is the one. Nanally has exceptional uptime and triggers Follow-up attacks after every Skill, which makes the rotation extremely forgiving of mistakes. Sakiri groups enemies together while Jiuyuan enriches every Vita Pistil produced by Blossom, the key elemental reaction of the composition.
Four-step rotation
- Jiuyuan: Skill to set up the Lethal Rose Pact.
- Sakiri: hold Skill to group enemies and apply the global ATK buff.
- Esper Zero: Esper Cycle to recharge gauges.
- Nanally: Skill → Ultimate → basic attacks until recharge.
Use case: Anomaly Hunts (enemy groups), daily content farming, open-world exploration and recurring mob packs.
F2P version: Nanally → Chiz (Incantation DPS), Sakiri → Aurelia (A, Cosmos buff + AoE Psyche), Jiuyuan → Skia (A, Lakshana AoE). This is the only one of the five compositions that remains almost entirely playable without a summoned S-class character, which makes it ideal for progressing up to the first limited banners.
Lacrimosa Squad — DoT Nightmare: the shield killer
Composition: Lacrimosa (S, Cosmos, DoT DPS), Sakiri (S, Cosmos, DoT amplifier), Haniel (A, Psyche, Nova trigger), Fadia (S, Psyche, survival / sub-DPS).
Lacrimosa is the poison specialist. She stacks the Nightmare reaction, copies certain enemy skills and ticks a DoT that ignores most invulnerability phases. This is the answer when a boss hides behind a shield or goes invincible for several seconds: your DPS keeps running in the background. Fadia shares incoming damage with the team to hold the line while the DoT does its work.
Four-step rotation
- Sakiri: AoE Skill to group enemies and increase DoT taken.
- Haniel: Nova Skill to amplify the offensive window.
- Fadia: activates her damage-sharing passive.
- Lacrimosa: stays on the field, stacks Nightmare, copies enemy skills and spams her Ultimate.
Use case: bosses with shields or invulnerability phases, City Endurance (long fights), Beyond the Rails (successive rounds).
F2P version: Lacrimosa → Chiz, Sakiri → Aurelia, Fadia → Mint (A, sub-DPS with solid parry). Without a real DoT, you rely on Mint's parry and on Charge; performance is halved, but it's usable during the learning phases.
Daffodil Squad — Break Boss Killer: the steamroller
Composition: Daffodil (S, Psyche, DPS / Breaker), Baicang (S, Anima, Scorch trigger), Sakiri (S, Cosmos, CC and buff), Haniel (A, Psyche, Discord trigger).
Daffodil is the undisputed queen of white bars. Her reactive parries break the Break Bar within seconds, and her damage against broken bosses skyrockets thanks to the Scorch (Baicang) + Nova (Haniel) combination that triggers Discord. Multiplied by the Break window, every one of Daffodil's strikes becomes devastating. The composition is designed for City Endurance floor bosses and the Scarborough Fair event.
Four-step rotation
- Baicang: Skill to apply Scorch and chip away at the Break Bar.
- Haniel: triggers Nova to open Discord.
- Sakiri: CC Skill to lock down the boss.
- Daffodil: Parry Skill, then Ultimate as soon as the boss is Broken.
Use case: unique bosses with a large Break Bar (Anomaly Hunts), floor bosses in City Endurance, Scarborough Fair event content.
F2P version: Daffodil → Mint (free parry, Chaos DPS), Baicang → Adler (Anima buff and shield), Sakiri → Aurelia. The F2P setup leans more on parrying than a true Break Bar killer, but remains usable for progression while waiting to pull a dedicated S-tier class.
Rotation summary table

| Squad | Step 1 | Step 2 | Step 3 | Step 4 |
|---|---|---|---|---|
| Shinku — Cosmos Burst | Hathor: Remora | Esper Zero: Cycle | Jiuyuan: Charge | Shinku: Ultimate |
| Chaos — Lakshana Sustain | Haniel: ATK buff | Esper Zero: Cycle | Hathor: Remora | Chaos: Skill + Ultimate |
| Nanally — Blossom AoE | Jiuyuan: Rose Pact | Sakiri: buff/CC | Esper Zero: Cycle | Nanally: Skill → Ultimate |
| Lacrimosa — DoT Nightmare | Sakiri: DoT taken | Haniel: Nova | Fadia: share | Lacrimosa: Nightmare |
| Daffodil — Break Killer | Baicang: Scorch | Haniel: Nova | Sakiri: CC | Daffodil: parry → Ultimate |
Arcs, resources and common mistakes
A meta squad is worthless without the right Arcs. The five compositions above particularly benefit from:
- Marching Beyond Time — dedicated to burst DPS types like Shinku or Hotori.
- Blow up the Crowd — Psyche supports: Haniel, Iroi, Fadia.
- Ready-Ready — on-field Anima DPS: Nanally, Baicang.
- The Last Rose — DoT-specific, essential for Lacrimosa.
- What's Desired — for Chaos and any Lakshana DPS.
- Fluff of Ferocity — generic Arc focused on crit rate.
As for resources, the priority hierarchy is clear. The Character Pixel (the equivalent of constellations or eidolons) should be invested first on your main DPS, never spread across multiple units. Annulith, the premium currency, should be saved for limited banners, never spent on permanent banners. Rift Crystals are used to level up S-tier class Arcs — always start with your main DPS's Arc, then expand to your preferred trigger unit. A single high-rarity Rift Crystal can represent up to three days of weekly farming, so plan your farm route accordingly. Finally, Tri-Keys unlock high-level chests in Anomaly Hunts: save them for runs where your team finishes at least A rank.
Three recurring mistakes to avoid: investing in two DPS in parallel without finishing one first (development farming is too slow early in the patch), neglecting the Esper Cycle (without cycling, half of the meta kit remains inactive), and ignoring the Break Bar — a real Breaker like Daffodil or Baicang speeds up an Anomaly Hunt fight by 40 to 60%. Also be careful not to confuse a buffer with a healer: Sakiri buffs and applies CC, but doesn't heal; bring Fadia or Baicang to survive City Endurance.
Conclusion: which squad to build depending on your stage
If you're just starting patch 1.2, the Nanally — Blossom AoE remains unbeatable for farming and unlocking your first resources. As soon as you get your hands on a limited S DPS, head toward the Shinku Squad — Cosmos Burst to take down unique bosses quickly. More advanced players will aim for the Chaos Squad — Lakshana Sustain to hold up in endurance modes, while Lacrimosa DoT and Daffodil Break Killer become essential as event bosses multiply invulnerability phases and large white bars.
Patch 1.3, expected in fall 2026, will likely introduce new Iroi-adjacent characters that will reshape the place of pure support — especially if Iroi paves the way for a full archetype of dedicated buffers. In the meantime, these five squads cover the entirety of the currently available endgame content and allow players to confidently tackle the upcoming Anomaly Hunts scheduled during the Scarborough Fair. Keep in mind that the meta evolves quickly: every seasonal event brings its share of adjustments, and a squad deemed mediocre in the previous patch can suddenly become dominant again after a simple numerical rebalance. Flexibility and mastery of rotations ultimately remain the true assets of an experienced NTE player.
Share this article
Which composition will you test first after patch 1.2?
Frequently asked questions
Do you absolutely need Shinku to stay competitive in 2026?
No. Shinku crushes short phases, but Chaos Lakshana Sustain still dominates endurance content and earns solid ranking points. If you're aiming for top 50, Shinku helps; if it's top 500, Chaos is enough. F2P players can also hold their own with Chiz (free S-class) in a downgraded Cosmos Burst setup.
Which team should a pure F2P player without limited banners use?
Nanally Blossom AoE. It's the only composition where you keep 80% efficiency with Chiz (free S-class DPS), Aurelia, Skia, and Esper Zero. The others require at least a lucky pull on Chaos or Hathor.
Is Lacrimosa DoT worth a pity pull in 2026?
Only if you regularly tackle event bosses and hate getting stuck on shield phases. For Beyond the Rails and standard ranking, Chaos/Shinku earn more points. It's a specialist's luxury, not a core pick.
Does Iroi replace Haniel in every composition?
No. Iroi provides a more powerful global ATK buff, but Haniel also offers healing plus swap economy. Iroi perfects Chaos/Lacrimosa compositions, while Haniel remains solid for versatility. Both coexist depending on the content.
Did patch 1.2 kill off the old metas (Karma, Lux)?
Pretty much. They're still playable but lose 40-50% efficiency compared to the five compositions listed. Hotta Studio has clearly rethought synergy around Remora/Charge and Nightmare, so yes, this is a major update.
Key takeaways
- Shinku Cosmos Burst becomes the queen of Anomaly Hunts thanks to her near-permanent Remora/Charge loop.
- Chaos Lakshana Sustain remains the go-to reference for Beyond the Rails and any content lasting more than two minutes.
- Nanally Blossom AoE plays with almost no S-class investment and gets the job done in farming, making it perfect for beginners.
- Lacrimosa DoT Nightmare breaks through armored bosses' immunity, where other compositions plateau.
- Iroi Support finally unlocks a pure ATK amplifier that breathes new life into hybrid compositions.
Comments
No comments yet. Be the first to react!
Leave a comment
Similar guides




Latest articles








Your opinion counts
Rate NTE: Neverness to Everness
Click a star to rate