



 Alexandre Jollier
Beginner's Guide
Splatoon Raiders tank and gadgets: what to pick at the start?
In brief
Picking the powerful tank right from the start in Splatoon Raiders guarantees smooth progression and solid gadgets for dozens of hours. The key tip: unlock the Tank Overcharge (50,000 power eggs), then combine the Splashette and the Splatellites for an aggressive melee playstyle. Just be sure to always keep a ranged weapon on hand to cover your blind spot at long range.
The choice of tank comes very early in Splatoon Raiders, even before you have a clear idea of what's ahead. And this choice isn't trivial: it determines your available gadgets and the speed at which you progress. Don't panic, you can switch tanks - but you can only level up one at a time.
Powerful, Fast or Tactical: which one to pick first?
The short answer: the powerful tank. For beginners as well as those who want a smooth power curve, it's the strongest choice from the first hours onward. The gadgets available at the start are good enough to last well into the adventure - and that's where it really makes a difference.
A crucial point to understand: you only accumulate gadget upgrades for the tank currently equipped. So if you want to capitalize on the powerful tank and its gadgets, it's better to stick with it while you build a solid foundation. Switching tanks too early dilutes your progress.
The upgrade to unlock first: Tank Overcharge
The powerful tank has a signature upgrade called Tank Overcharge, unlocked after collecting 50,000 power eggs with this tank equipped. The idea: stay submerged in swimmer form for a certain time, then come back out to trigger a +20% damage bonus for a few moments.
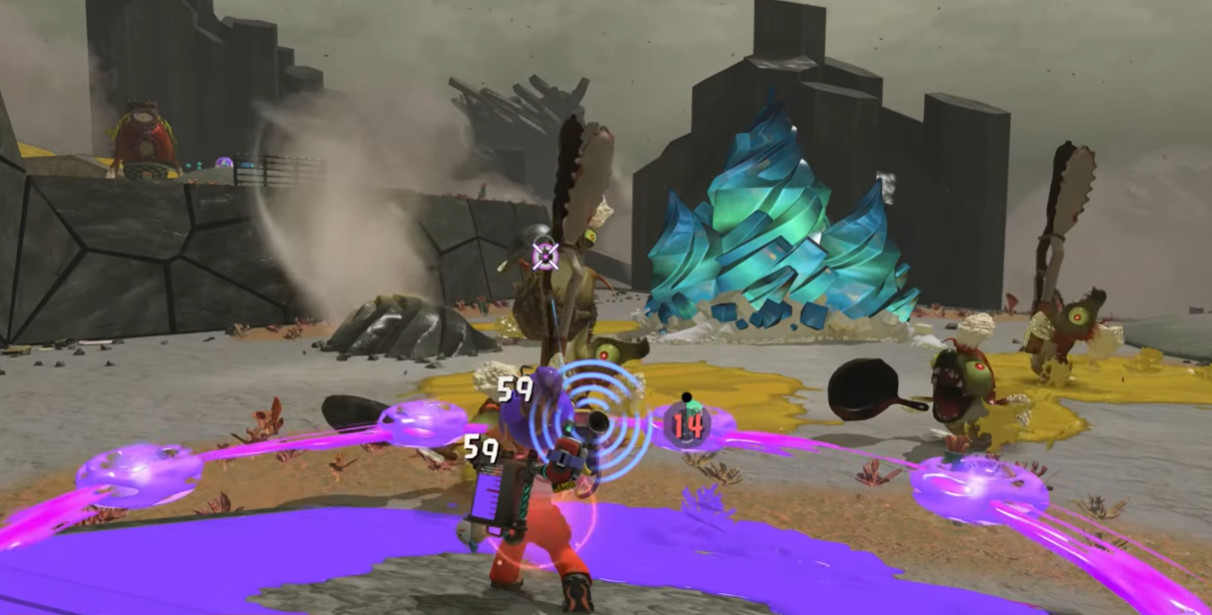
A gauge appears while diving to show you when the effect can be activated. It's simple to manage once the reflex is ingrained, and the impact on how quickly you take down enemies is immediate. Priority number one: farm the 50,000 eggs as fast as possible to unlock this.
The two Powerful gadgets to prioritize
Once you have the powerful tank in hand, two gadgets clearly stand out - and they work particularly well together.
Splashette
The Splashette is all about raw damage. The idea is simple: you charge at the enemy and slash everything in an arc in front of you. Not much thinking required to use it, but plenty of damage to gain - especially as you get the upgrades.
The downside is that it requires getting close. Against enemies that hit hard up close, that can hurt. And targets that are too far away are simply out of reach. So you'll need a decent ranged weapon alongside it to compensate.
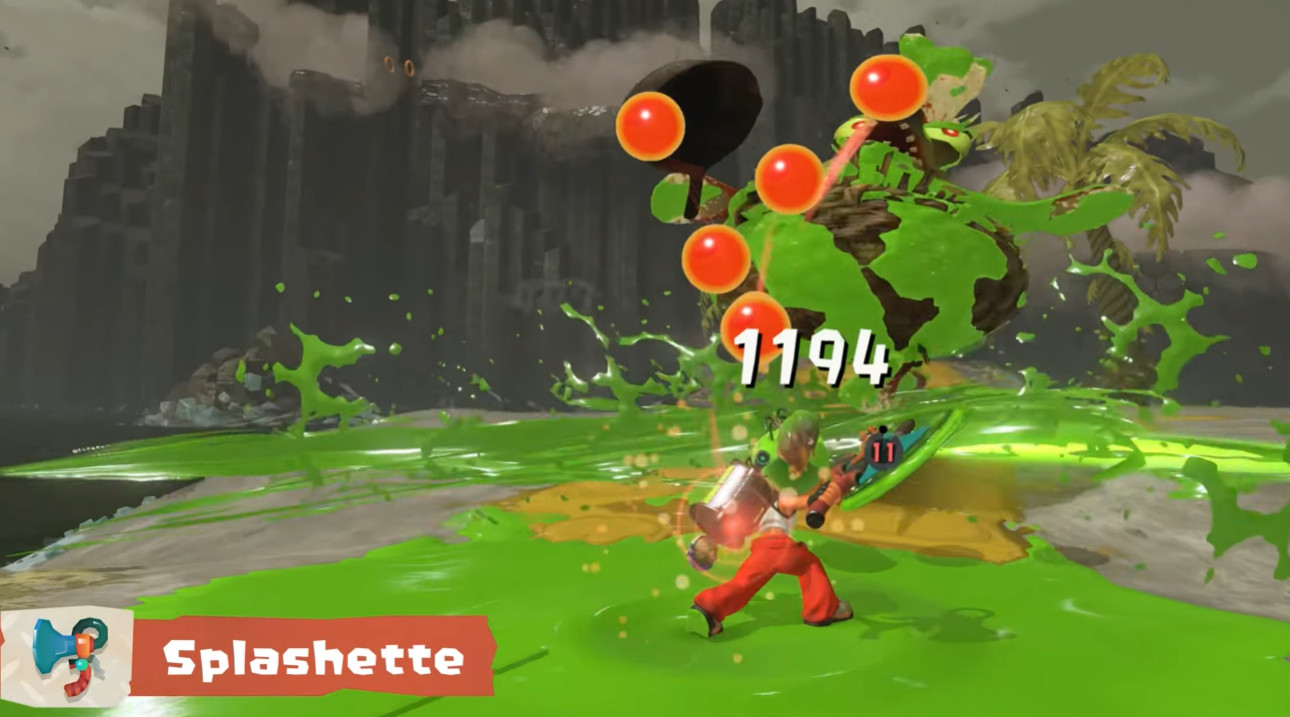
For Splashette upgrades, focus on:
- Cooldown reduction - to use it more often
- Damage reduction taken - to survive the moments when you dive into the fray
Splatellites
The Splatellites work differently: discs orbit continuously around your character, hitting nearby enemies and inking the ground as they pass. This is passive damage, meaning you don't have to do anything special - they work while you take care of everything else.
The synergy with the Splashette is obvious: you charge at the enemy with the Splashette, and the Splatellites deal extra damage the whole time. They also act as a passive shield when you're in melee range - handy for absorbing a bit of pressure. Same limitation as the Splashette on distant targets: the Splatellites don't cover long range either.
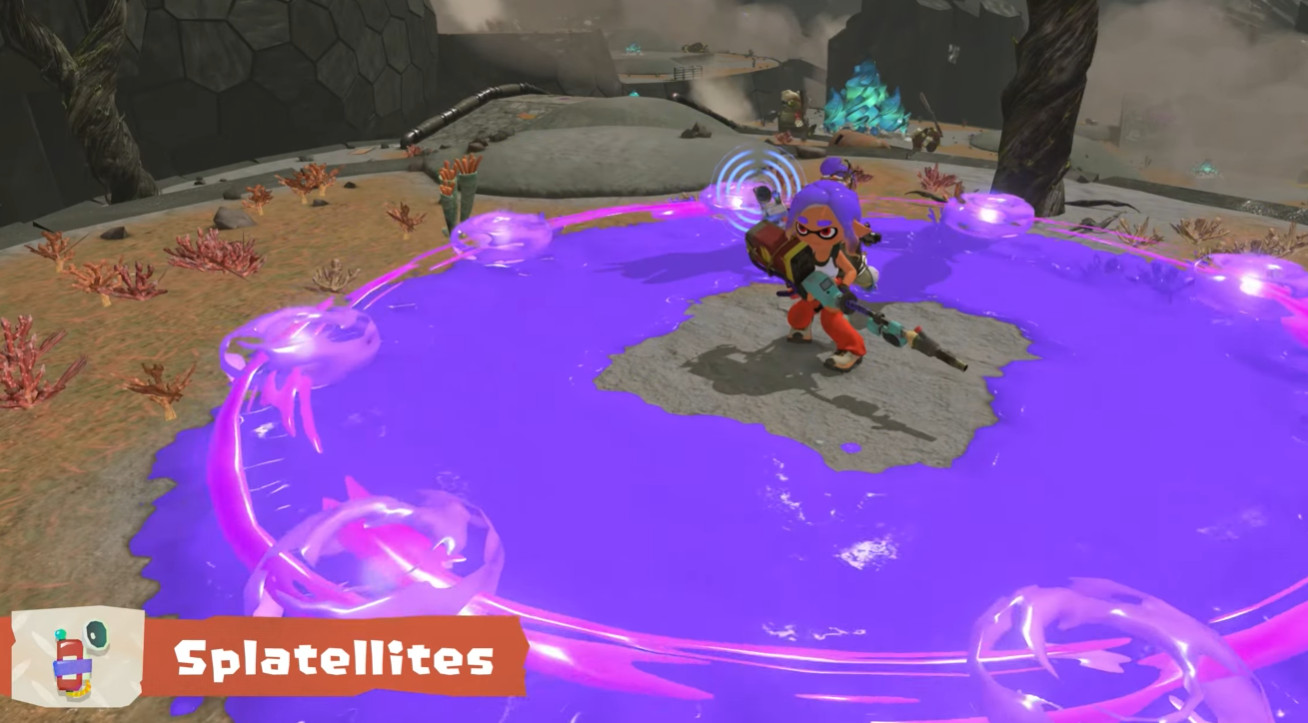
For Splatellites upgrades, prioritize:
- Duration - to extend how long the discs orbit
- Damage - so each pass hits harder
- Expand the area - to widen the zone covered by the discs
The logic of the full build
The powerful tank + Splashette + Splatellites combo shapes a playstyle clearly geared toward close-range aggro. You dive to charge Tank Overcharge, come back out triggering the damage buff, charge in with the Splashette while the Splatellites rain down damage. Effective, fast-paced, and not complicated to pull off.
What you absolutely need to keep in mind
Always keep a ranged weapon in your arsenal to handle situations where getting close is too risky or impossible. The build has a real blind spot on ranged combat - don't ignore it.
Share this article
Which playstyle appeals to you most in Splatoon Raiders?
Frequently asked questions
Can I switch tanks without losing too many of my upgrades?
Yes and no. You can freely switch between tanks at the Hideout Ship, but only the equipped one accumulates upgrades. Switching too early dilutes your progression — it's better to stick with the powerful tank until you've solidified your base.
Why do the Splashette and the Splatellites work well together?
The Splashette propels you into melee range, and meanwhile the Splatellites deal passive damage around you. The discs also act as a mini-shield when you're in melee, which limits the damage you take.
What's the real weakness of this powerful tank + Splashette + Splatellites build?
No gadget covers long range. If the enemy is too far away or approaching is suicidal, you're stuck. Always keep a ranged weapon in your arsenal to compensate for this blind spot.
How long does it take to unlock the Tank Overcharge?
You need to collect 50,000 power eggs with the powerful tank equipped. This is your number one goal — this upgrade truly transforms your combat effectiveness.
Key takeaways
- The powerful tank is the optimal choice for starting out, its initial gadgets last a long time and its progression stays smooth.
- Only switch tanks if you're willing to lose momentum — upgrades only accumulate for the currently equipped gear.
- Tank Overcharge is your signature upgrade to unlock as an absolute priority, the +20% damage changes everything against late-game waves.
- Splashette and Splatellites form a devastating duo: raw damage plus passive damage, but you lack range at long distance.
Comments
No comments yet. Be the first to react!
Leave a comment
Similar guides
Latest articles








Your opinion counts
Rate Splatoon Raiders
Click a star to rate