



 Fabian Lainé
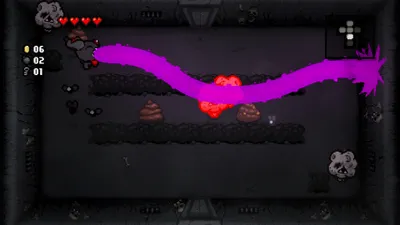
Full Guide
The Lost & Tainted Lost: Delirium Unlock Guide (Isaac Rebirth)
In brief
The Lost is the most punishing yet most rewarding character in The Binding of Isaac: Rebirth. With just one HP, no hearts, but Spectral Tears, unlimited Flight and Holy Mantle in the modern version, it's the best school of progression for taking down Delirium. This guide covers the unlock via Judas's Shadow, the ten S-tier items that turn a run into a bloodbath, and the pitfalls to avoid.
In The Binding of Isaac: Rebirth, no character divides the community as much as The Lost. One hit point, no displayable hearts, instant death on the slightest contact: the smallest misjudged shot sends the run back to square one. In exchange, the small translucent silhouette starts with Spectral Tears, unlimited Flight, and, since Afterbirth+, a Holy Mantle that absorbs one hit per room. This is the very definition of high risk / high reward, and it's also the best school for improving at Isaac.
This guide covers everything you need to know in 2026 about Repentance+: the modern unlock procedure via the Judas's Shadow quest then Missing Poster, the starting kit, the Tainted Lost variant, the ten items that turn a desperate run into a slaughter, the ones that troll the race to victory, and finally the mid-game route that lets you take down Delirium, The Beast, and Home without ever taking damage.
Unlocking The Lost before Afterbirth: the four specific deaths
A quick historical reminder, because the old procedure still pops up in pre-2016 YouTube tutorials. When Rebirth was released, unlocking The Lost required four scripted deaths, one per character, in a precise order and without any in-game indication:
- Isaac had to die in Basement II from a bomb triggered by a Mulliboom.
- Magdalene had to die in Caves II by stepping on a spike trap.
- Cain had to die in Depths II from a shot bounced back by Mama's Boy or a Pooter.
- Judas had to defeat Satan without owning any items, then die in the post-boss explosion.
Each death had to be performed in a separate run, with no floor mistakes and no character mistakes. The sequence drove an entire generation of players mad, and Edmund McMillen himself acknowledged it as excessive gatekeeping — hence the complete overhaul of the unlock in the Afterbirth+ DLC.
Unlocking The Lost since Afterbirth+: the Judas's Shadow quest then Missing Poster
On modern versions of the game (Afterbirth+, Repentance, Repentance+), the official procedure is much clearer. You simply need to obtain Judas's Shadow or Missing Poster while playing as Judas. Receiving the trinket for the first time automatically triggers the unlock at the end of the run.
In practice, the most reliable method is to:
- Select Judas at the main menu.
- Descend normally down to the Womb or the Depths and force as many Devil Deals as possible (skip hearts, dodge damage).
- Pay a Devil Deal at a single black heart to obtain Judas's Shadow. This quality 3 item is present in the Devil pool.
- Finish the run — any death or victory triggers the unlock, and you don't even need to beat the boss.
Alternative if RNG refuses to grant Judas's Shadow: reach the second floor and find Missing Poster, the trinket that directly symbolizes The Lost. The trinket can spawn on any floor as long as you're still playing Judas. Once picked up, simply keep the run alive until death or victory to complete the quest.
Important reminder for Repentance+: the procedure works on all Xbox, PlayStation, Switch, Steam, and Epic versions. No regional rules, no Hard Mode restrictions. In under an hour of focused play, The Lost is unlocked for good.
The starting kit: one hit point, Spectral Tears, Flight, Holy Mantle in Repentance+
The Lost's fundamental kit hasn't changed since Afterbirth+ but it remains unique in the game:
- 1 HP, no displayable heart. Neither red heart, nor soul heart, nor black heart can be stored. HP up items are removed from the pool.
- Base Spectral Tears. Tears pass through walls, rocks and poop, which allows for firing angles that other characters cannot afford.
- Permanent Flight. Pits and floor spikes become invisible to The Lost, which literally changes the exploration mechanics of the Caves, the Womb and the Corpse.
- Eternal Heart at spawn. On modern versions, an Eternal Heart is placed next to The Lost in the starting room, allowing you to buffer a first hit if you're reactive.
- Base D6. The same active item as Isaac, with its six-room recharge, allows you to reroll any pedestal item — vital for avoiding troll items which we'll discuss below.
- Holy Mantle starting from Afterbirth+ (and therefore Repentance+). The shield absorbs one hit per room and automatically recharges upon changing rooms. It's the defensive pillar that makes the run to victory playable on both keyboard and controller.

Tainted Lost (T. Lost): even more punishing, even stronger
Repentance introduced a corrupted version of each character. Tainted Lost pushes this logic to its extreme: Holy Mantle is removed from the starting kit, leaving a single hit point with absolutely no safety net. In exchange, his base damage is doubled, his tears gain a massive shot speed buff and he automatically obtains Q1 Missing No. starting from the Depths, which fully rerolls his build with every floor change.
Unlocking him requires using a Red Key on the Home room (the final floor) while playing as The Lost. The Red Key generates a red door leading to a hidden room where the Cracked Key and the inscription that unlocks Tainted Lost for all future runs will spawn.
T. Lost is the recommended character once you've already mastered classic The Lost. The raw damage multiplier turns every damage item into a boss-killing machine.
The ten S-tier items for The Lost
Certain items transform the character from a rigorous exercise into a legendary killer. Here are the ten references to farm, in order of priority:
- Godhead. Permanent damage aura around every tear, plus homing tears. It's the most powerful defensive and offensive item in the game, even better suited to The Lost's fragile nature.
- Sacred Heart. Guaranteed homing and a massive damage boost. Almost systematically farmable via Angel Rooms.
- Brimstone. The charged red laser keeps piercing through walls thanks to Spectral Tears: ridiculous firing angles on Delirium.
- Void. Absorbs active items to compress several C-tiers into a single massive strike. Combined with Habit or Battery, you generate a Void laser every two rooms.
- Death Certificate. Opens the hidden floor containing every item in the game. A priority when the run is lacking in defensive items: go there to pick up Sacred Heart, a second layer of Holy Mantle, or Mom's Knife.
- Mom's Knife. Combined with Spectral Tears, the knife pierces through everything, kills Mega Satan's phase 2 in three throws, and melts Delirium.
- Tech X. A piercing energy ring that combines perfectly with Brimstone and Mom's Knife via Void.
- Sacred Orb. Automatically rerolls quality 0 and 1 items across all pools. A must-pick as early as the Basement.
- Birthright. On The Lost, Birthright removes useless items (HP ups, other Spectral Tears) from future pools, densifying every pedestal with genuinely useful items.
- Psy Fly. A defensive familiar that destroys enemy projectiles. On a one-HP character, that dodge assistance is worth its weight in gold.
Note that a second Holy Mantle picked up doubles the defensive layer. A T. Boy found in the Devil Room literally turns the end of the run into a walk in the park.
Troll items to know to refuse on The Lost
The corollary: some items purely and simply destroy the viability of a run. The rule is to always reroll with the D6, or ignore the pedestal if the D6 is on cooldown.
- Guppy. No relevant contact damage on The Lost since it has no red HP to pay. Guppy items (Guppy's Tail, Head, Collar) should be refused, unless they trigger the transformation that grants Flight and flies (already acquired).
- Judas's Shadow (as a Devil Deal). Ironically, the item that unlocks The Lost becomes useless since the revive spawns Dark Judas with half a black heart... which The Lost cannot keep.
- Missing No. Fully rerolls all passive items on every new floor. On The Lost, you're farming rare items: absolutely refuse it.
- Anemic, Book of Belial (as a Devil Deal), 1UP, Yum Heart. All items tied to red hearts are lost.
- Dead Cat. Locks HP at 1: that's already the case, no benefit, and the item consumes a pedestal.
- Ipecac, unreadable Dr. Fetus. Without an active Holy Mantle, splash damage ends in instant death. Only take it if you're experienced and mobility is locked in.
- Habit. The item recharges your active at the cost of half a heart: useless with no HP to spend.
The mnemonic rule: anything tied to red health is trash; anything that protects or kills is a priority.
Mid-game strategy: Womb then Blue Womb then Delirium in one heart
The shortest path to Delirium requires a precise floor plan. Goal: reach the Blue Womb with a complete defensive build and the Emperor Card or the key Boss Rush item in hand.
- Basement I - II. Farm every room to maximize damage items. Always open Devil Deals even if you can't pay for anything: simply entering grants runes.
- Caves I - II. Mandatory detour through the Curse of the Labyrinth room if possible: double loot for a single boss.
- Boss Rush. Entry is possible if you finish Depths I in under 20 minutes. The Boss Rush gives two items at the end of the gauntlet — this is where you pick up Void or Godhead.
- Depths I - II. Prioritize Angel Rooms via The Book of Virtues or Sacred Orb. Target: Sacred Heart or Godhead.
- Womb / Utero. Don't go down through the regular trapdoor. Look for the Eye of the Occult (blue window on It Lives) to unlock the portal to Blue Womb.
- Blue Womb. Hush boss. Unlock window: under 30 minutes of run time since launch. Hush drops the Delirium key: the fight against Delirium unlocks via the portal in the post-Hush room.
A critical point for The Lost: entering the Blue Womb requires staying under thirty minutes. You therefore sacrifice the exhaustive exploration of the second half of the run to prioritize speed. The D6 is then used to reroll pedestals with a single click rather than wandering around.
The endgame: Delirium, The Beast, and Home with a single hit point
Three final bosses compete for the title of hardest: Delirium (Blue Womb), The Beast (Home), and Mega Satan (Cathedral / The Chest). Each demands a specific read when you can only absorb a single hit per room.
Delirium
The boss randomly transforms into any previous boss. The key mechanic to remember: when Delirium suddenly teleports into melee range, you must instantly dodge diagonally. Spectral Tears allow you to shoot through its own body: stick to medium range, circle around it, and avoid the spiral tear-summoning pattern. Sacred Heart or Godhead end the fight in under a minute.
The Beast (Home)
The Beast is the ultimate boss introduced in Repentance. Three preparatory phases: Ultra Famine (horizontal charges, position yourself perpendicular to it), Ultra Pestilence (fly swarms, Psy Fly clears everything), and Ultra War (diagonal charges, hug the edge). The final phase, The Beast itself, spams a rain of red tears: hug the wall in a circle. Holy Mantle absorbs one rain, then recharges when the respite window opens at the center.
Mega Satan
Boss of the Chest after the Cathedral. Its hands fly around with very readable telegraphs; phase two, with the giant angel, requires burst DPS. Mom's Knife, Brimstone, or Tech X clear it in ten seconds.
The general principle: every boss has a deterministic safe spot. You learn it, you replay it, you stop taking damage. The one-hit-per-room rule becomes a metronome rather than a threat: Holy Mantle absorbs the first hit, you leave the room through any available door, and come back healed. This leverage is what makes The Lost playable in the endgame despite its single hit point.
The Lost, the ultimate school of discipline
There is no character more formative on Isaac than The Lost. His fragility forces you to read every projectile, every boss pattern, every room. Once Holy Mantle is unlocked and once the D6 reflex on every questionable pedestal has been adopted, the character becomes a marks machine: Boss Rush, Hush, Delirium, Mega Satan, The Beast, Mother, Ultra Greedier — the entire completion panel becomes accessible in about thirty focused runs.
The step up in class continues with Tainted Lost, whose doubled damage turns the exercise into a haute couture performance. It's also the best possible preparation for tackling the other one-heart characters (The Keeper, Tainted Keeper) and for taking on 100% completion runs, which remain, in 2026, the ultimate benchmark of the Isaac speedrun scene.
Share this article
What's the biggest challenge for you with The Lost?
Frequently asked questions
How long does it take to unlock The Lost in 2026?
Less than an hour. Just play Judas, stack Devil Deals until you get Judas's Shadow (or Missing Poster), then finish the run alive or dead. The procedure works on all versions: Steam, Xbox, PlayStation, Switch, Epic.
Can The Lost really beat Delirium without taking damage?
Yes, with the right build. Godhead + Sacred Heart + Brimstone or Mom's Knife provides enough damage and defense (homing + damage aura + spectral angles) to dodge every projectile and finish before phase 3. It takes practice, but it's clearly doable.
Why refuse Guppy on The Lost when it's an S-tier item elsewhere?
Because The Lost has no red HP to spend to trigger the Guppy transformation (which requires 2 red hearts). Guppy items become useless unless they already grant Flight and flies, which The Lost already has on spawn.
What's the difference between The Lost and Tainted Lost?
The Lost has Holy Mantle, which absorbs one hit per room, while Tainted Lost only has 1 bare HP. In exchange, T. Lost doubles damage, improves shot speed, and gets Q1 Missing No. for a full floor reroll on every level.
Is Death Certificate really worth a pedestal on The Lost?
Absolutely. Direct access to every item in the game lets you seek out Sacred Heart, a second Holy Mantle, or Mom's Knife if the run lacks defense or damage. It's a mid-run lifeline that keeps you from getting stuck with a bad build.
Key takeaways
- The Lost unlocks simply, since Afterbirth+, by picking up Judas's Shadow or Missing Poster with Judas, without the four scripted deaths from before
- Their starting kit (1 HP, Spectral Tears, Flight, Holy Mantle) is unique: no accumulating hearts is possible, but every enemy hit costs everything
- Godhead and Sacred Heart are the two priority items that turn a fragile run into a killing machine with massive damage and homing
- Some items like Guppy or Judas's Shadow must be systematically refused with the D6 so as not to sabotage the run's viability
- Tainted Lost removes Holy Mantle, leaving a single bare HP, but doubles damage and grants Q1 Missing No.: a choice for experienced players
Comments
No comments yet. Be the first to react!
Leave a comment
Similar guides
Latest articles





Your opinion counts
Rate The Binding of Isaac: Rebirth
Click a star to rate